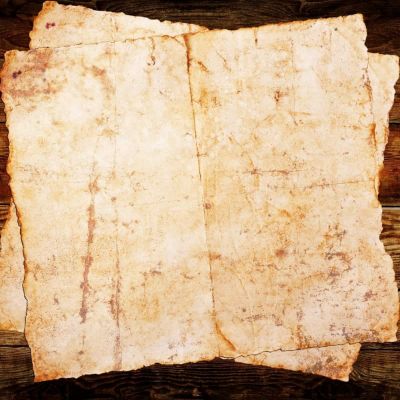
Creating a vintage look on paper adds a touch of nostalgia and authenticity to various creative projects. Whether you’re working on a scrapbooking endeavor, crafting invitations, or simply looking to add a unique aesthetic to your writing, learning how to make the paper look old can be valuable. You can transform new, pristine sheets into weathered and aged parchment by employing simple techniques, evoking a sense of history and charm. In this blog post, we will explore a range of methods to achieve that vintage effect, from tea and coffee staining to ink aging, burning edges, and wrinkling.
Looking to create something with paper? Learn how to make paper mache in our easy guide! Paper mache is a fun and versatile craft that allows you to make anything from masks to sculptures.
Additionally, we will provide techniques for enhancing the vintage look further, such as ink blotches, quill pen writing, and distressing. Prepare to embark on a journey of creativity and nostalgia as we delve into making paper look old.
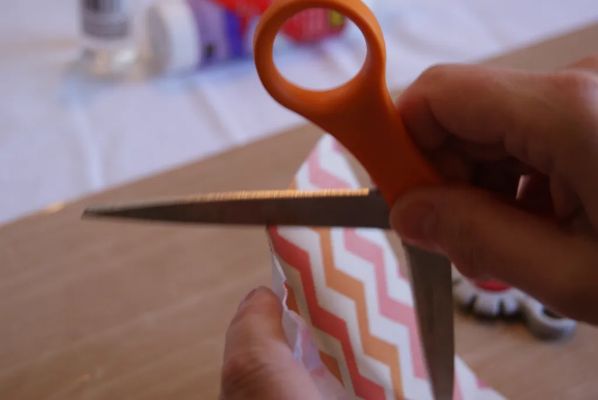
Choosing the Right Paper for an Authentic Paper Old Look
Before diving into the techniques of aging paper, it’s crucial to start with the right foundation. The choice of paper plays a significant role in achieving an authentic vintage look. Understanding the characteristics and options can help you successfully create the desired effect.
Paper Characteristics
When selecting paper for a vintage look, consider the following characteristics:
- Look for paper with a slightly rough or textured surface. This mimics the feel of aged paper and adds to the overall vintage aesthetic.
- Opt for the heavier paper to replicate the thickness and durability of ancient documents. The thicker paper also enhances the tactile experience.
- Off-white or cream-colored paper is often the best choice for a vintage effect. Avoid bright white paper, as it can appear too pristine and modern.
Learn how to make your paper look old using simple techniques like staining and crumpling. Once you’ve achieved that vintage look, why not try making beautiful paper tissue flowers? Follow our easy guide to create stunning floral decorations from simple materials.
Selecting Appropriate Paper Types and Textures
Different paper types can contribute to the vintage appearance. Consider options such as:
- Parchment paper has a natural antique look and is commonly associated with historical documents.
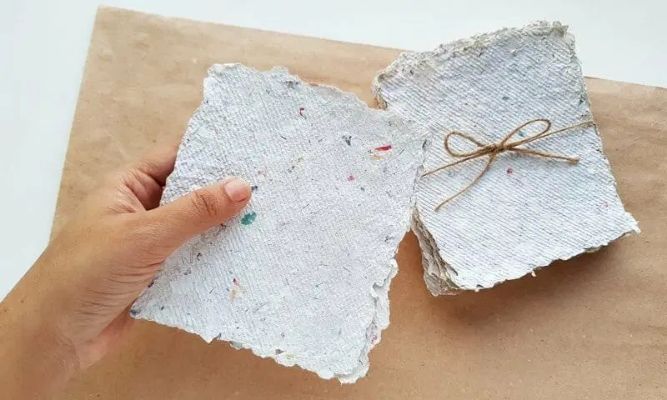
- Handmade paper often features irregular edges and fibers, adding to its vintage charm.

- Opting for recycled paper adds an eco-friendly element and contributes to a weathered and aged appearance.
Exploring Aged Paper Options Available In Markets
If you prefer a hassle-free approach, various retailers offer pre-aged paper that mimics the look of old documents. These options come in different styles and can save you time and effort.
Aging Techniques for Creating a Paper Vintage Look – Step-By-Step Guide For Different Techniques
Now that you’ve selected the right paper, it’s time to use various aging techniques to transform it into a vintage masterpiece. These techniques involve simple yet effective methods to simulate the effects of time and wear on paper, providing an aged and weathered appearance.
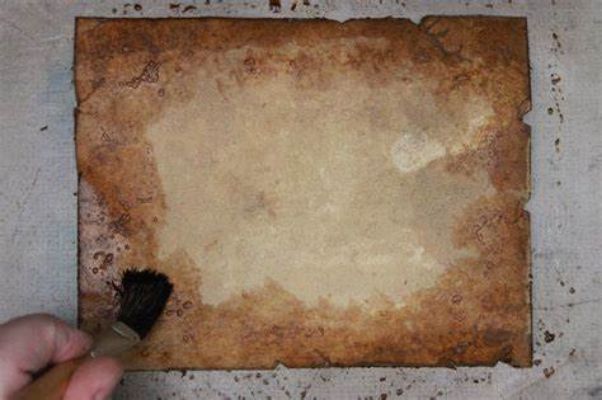
Tea Staining Method
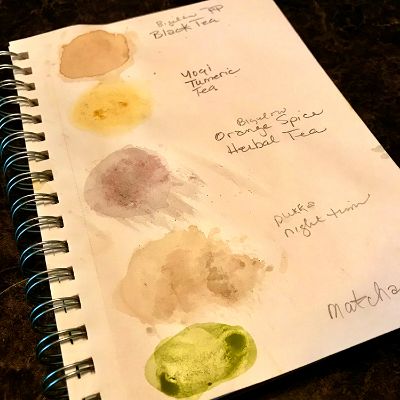
The tea staining method involves using brewed tea to stain the paper and give it a yellowed, aged look. Following a few steps, you can achieve varying degrees of discoloration, adding depth and character to your paper.
Step-By-Step Guide
- Prepare a strong cup of black tea by steeping several tea bags in hot water.
- Let the tea cool down to room temperature.
- Place your paper on a flat surface or in a shallow tray.
- Dip a sponge, brush, or cotton ball into the tea and lightly dab it onto the paper.
- Gradually build up the color by applying multiple layers of tea, allowing each layer to dry before adding the next.
- You can add character by lightly crumpling the paper before staining if desired.
- Once the desired effect is achieved, allow the paper to dry completely.
Coffee Staining Method
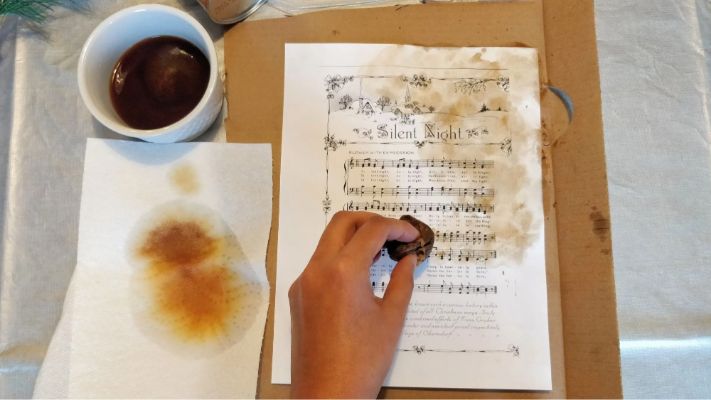
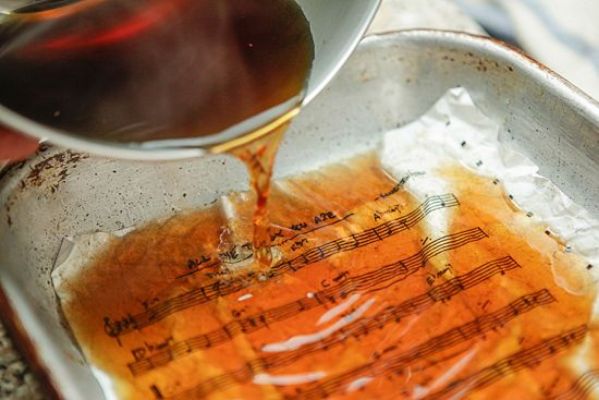
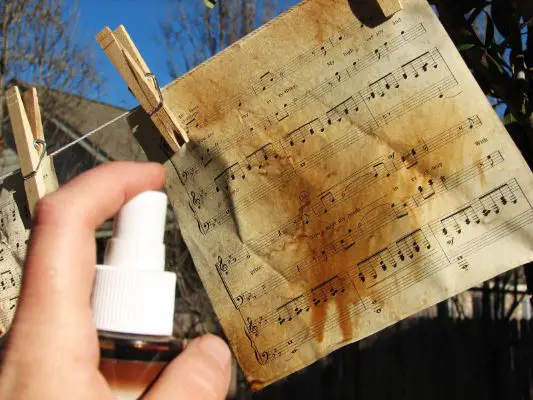
Coffee staining is similar to tea staining but offers a different tone and intensity. Applying coffee to the paper can create a darker, more sepia-toned effect reminiscent of antique documents and photographs.
| You can follow the steps given above by altering it with Coffee. |
Ink Aging Method
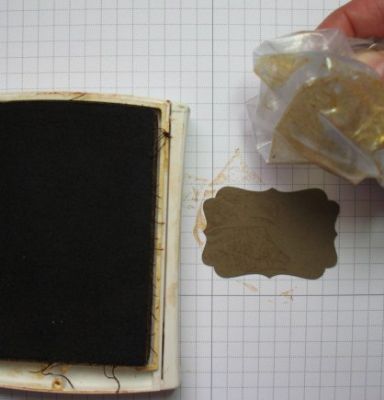
With ink aging, you can give your paper an aged appearance using specific inks and techniques. This involves selectively applying ink to mimic the natural fading and discoloration over time.
Step-By-Step Guide
- Select an ink color resembling aged paper’s natural discoloration, such as sepia or a muted brown.
- Dip a brush or sponge into the ink and lightly apply it to the paper, focusing on areas that naturally fade or darken over time, such as edges and creases.
- For a more realistic effect, vary the intensity of the ink by applying it in different concentrations and shades.
- Allow the ink to dry completely before handling the paper.
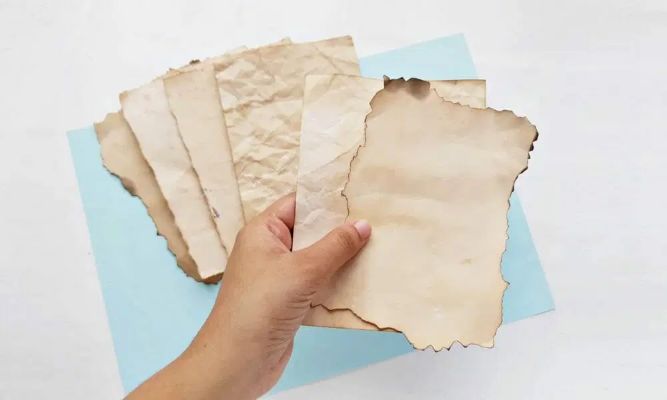
Burning Edges
Burning the edges of your paper can create a worn and weathered look as if it has been exposed to fire or other elements. This technique requires caution and careful control to achieve a realistic and controlled burn effect.
Step-By-Step Guide
- Take a lighter or a candle and carefully hold the flame near the edges of the paper.
- Move the flame along the edge, creating a controlled burn effect.
- Be cautious not to burn the paper too much or let the flame directly contact the paper’s surface.
- Adjust the amount of burning according to your desired level of weathering and aging.
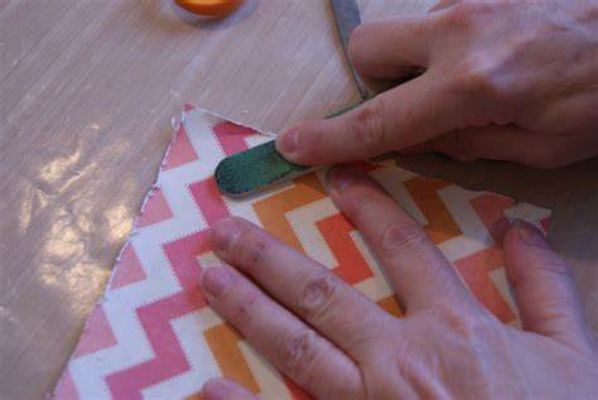
Wrinkling and Crumpling

By intentionally wrinkling and crumpling your paper, you can mimic the creases and folds naturally occurring over time. This technique adds texture and depth, making your paper appear well-used and aged.
Step-By-Step Guide
- Gently crumple the paper into a loose ball, careful not to tear it.
- Smooth the paper and repeat the crumpling process several times, creating different wrinkles and folds.
- Apply pressure or place heavy objects on the paper for more pronounced wrinkles.
- Once the desired level of wrinkling is achieved, carefully flatten the paper using your hands or placing it between heavy books.
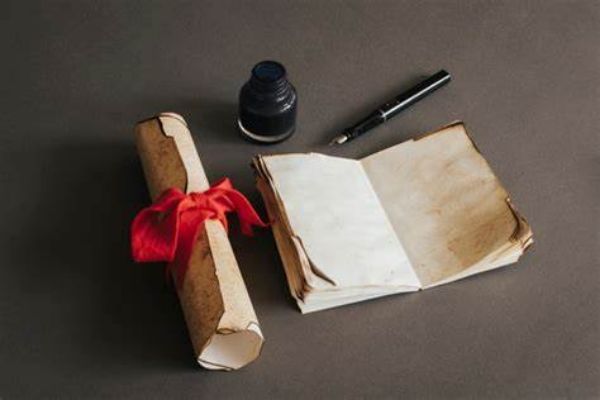
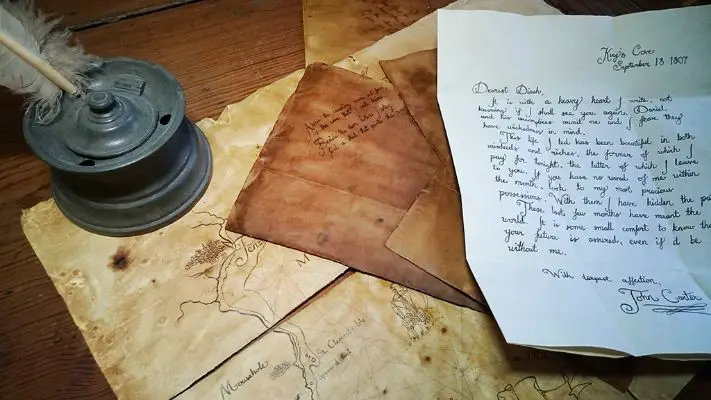
Writing with a Quill Pen
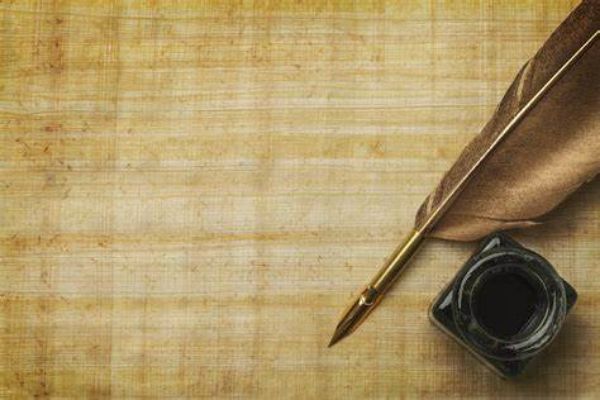

Consider writing with a quill pen to enhance the vintage aesthetic of your aged paper. This traditional writing instrument adds an extra layer of authenticity and charm to your vintage-inspired projects. In this section, we’ll explore the writing process with a quill pen and some writing techniques and tips to help you achieve a beautiful, historic-looking script.
Using a Quill Pen
- Choose a quill pen with a pointed tip for better control and precision.
- Consider using a goose or turkey feather for a more authentic look.
- Trim the tip of the quill to create a sharp point.
- If the quill is too stiff, gently heat it over a flame or hot water to make it more flexible.
- Use ink compatible with quill pens, such as calligraphy or fountain pen ink.
- Pour a small amount of ink into a shallow container or an inkwell.
Writing Techniques
- Hold the quill pen at a 45-degree angle to the paper for optimal ink flow.
- Experiment with different hand positions to find what feels comfortable and allows for smooth writing.
- Apply light pressure to the pen while writing to create thin, delicate lines.
- Avoid pressing too hard, as it may cause the ink to blot or smudge.
- Write slowly and deliberately, allowing the ink to flow smoothly.
- Use controlled movements to create consistent letterforms.
Writing Tips
- Before working on your final project, familiarize yourself with the quill pen by practicing strokes and letterforms on scrap paper.
- Developing a steady hand and achieving the desired results may take time.
- Ensure the ink has the right consistency for smooth writing. If it’s too thick, dilute it with a few drops of water. If it’s too thin, add a small amount of ink.
- Experiment with different lettering styles, such as calligraphy or historical scripts, to match the vintage theme.
- Research historic fonts or scripts for inspiration.
- Clean the quill pen regularly with water to remove any dried ink residue.
- Store the quill pen in a dry and upright position to prevent damage.
Distressing Techniques for Old Paper Look – Step-By-Step Guide
Distressing techniques add character and a weathered look to your paper, enhancing the vintage aesthetic you’re aiming for. Whether you want to create the appearance of wear, tear, or age-related damage, these step-by-step techniques will help you achieve an authentic vintage look for your paper.
Scratching and Scraping


Step-By-Step Guide
- Use a small, sharp object like a craft knife, sandpaper, or even a nail to gently scratch the paper’s surface.
- Create random lines, scratches, or patches of roughness across the paper.
- Vary the pressure applied to create different depths of scratches, imitating the natural aging process.
- Focus on worn and torn areas, such as corners, edges, and creases.
- Be careful not to tear the paper excessively or create unrealistic, uneven patches.
Water Damage Effects
Step-By-Step Guide
- Dip a sponge or brush into water and lightly dampen the paper in specific areas where water damage would typically occur, such as the edges or corners.
- Allow the water to sit for a few seconds to create a water stain effect.
- Blot the excess moisture with a paper towel, gently pressing down to create uneven and faded patches.
- If desired, repeat the process to intensify the water damage effect.
- Let the paper dry completely before continuing with other distressing techniques.
Fading and Discoloration

Step-By-Step Guide
- Use a soft brush or sponge to apply a diluted solution of tea or coffee to the paper.
- Lightly dab or brush the solution onto the paper, focusing on areas that naturally fade over time, such as the edges or areas exposed to sunlight.
- Allow the solution to dry on the paper.
- If the effect is too subtle, repeat the process with additional layers until the desired level of fading and discoloration is achieved.
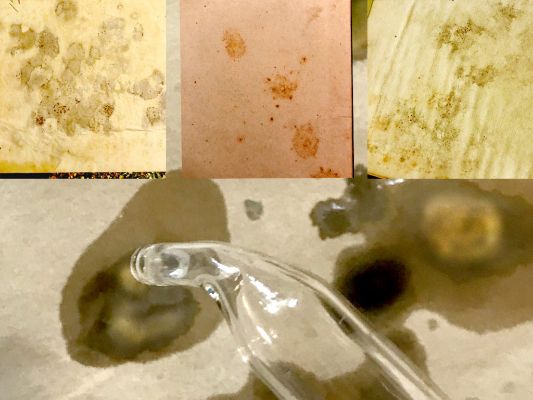
Adding Stains and Spots
Step-By-Step Guide
- Create a mixture of tea or coffee and water in a shallow container.
- Dip a sponge, brush, or cotton ball into the mixture.
- Lightly dab or flick the mixture onto the paper to create scars, spots, or stains.
- Vary the intensity and size of the stains to make them look more natural and random.
- Allow the stains to dry on the paper.
Want to engage your kids in creative activities? Check out our article on paper bag crafts for kids. These crafts are easy and enjoyable for children of all ages. From puppets to masks to simple gift bags, there’s something for everyone. So grab some paper bags and let the crafting begin!
Preserving and Displaying Aged Paper – Maintaining Your Vintage Creations

Once you have successfully aged your paper to achieve a vintage look, preserving and displaying it properly is essential. By following a few key preservation techniques, you can ensure the longevity of your aged paper and create a visually pleasing presentation. This section will explore the steps to preserve and display your aged paper effectively.
How To Handle a Vintage Paper with Care?
- Before touching the aged paper, ensure your hands are clean and free of oils or lotions.
- This prevents the transfer of dirt, moisture, or chemicals that could damage the paper.
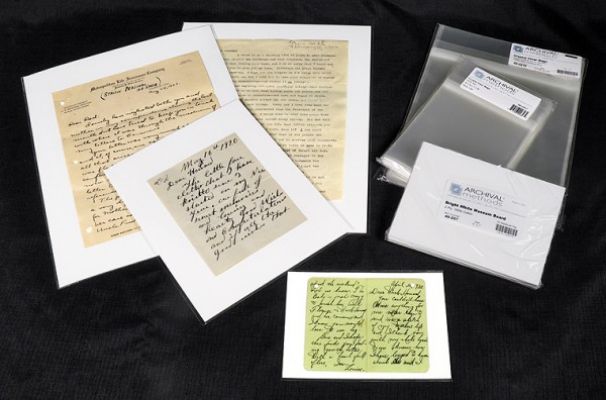
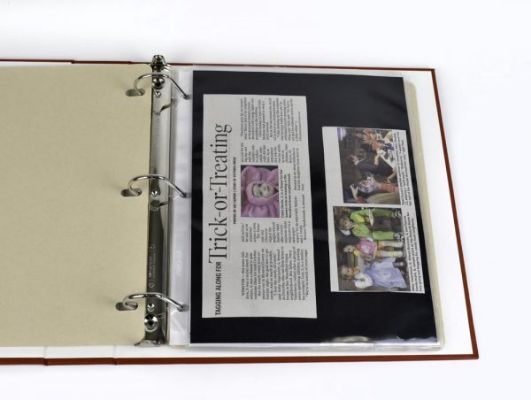
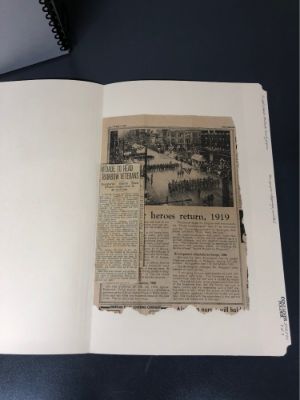
- When handling or storing aged paper, choose acid-free materials such as archival-quality folders, sleeves, or envelopes.
- Acidic materials can cause yellowing, deterioration, or discoloration over time.
How To Store A Vintage Paper?
- Store your aged paper flat to prevent creasing, bending, or warping.
- Place the paper in acid-free folders or archival-quality boxes to protect it from light, dust, and humidity.
- Store your aged paper in a cool, dry environment to minimize the risk of mold, mildew, or insect damage.
- Avoid storing paper in basements, attics, or areas prone to temperature fluctuations or high humidity.
What Are The Methods Of Framing and Displaying An Old Paper?
- If you display your aged paper, use UV-protective glass or acrylic frames to shield it from direct sunlight.
- UV rays can cause fading, discoloration, and deterioration over time.
- Consider matting your aged paper before framing to buffer the paper and the glass.
- Matting helps prevent the paper from sticking to the glass, preserving its integrity.
- Choose frames that complement the vintage aesthetic of your aged paper.
- Consider frames made from wood, metal, or distressed materials to enhance the overall vintage look.
Learn how to make paper look old with our simple techniques. Once you’ve mastered that, why not try making paper for kids? Click here to discover how to make paper that’s perfect for crafting with children!
At The End – Regular Inspection is Necessary
Regularly inspect your aged paper for signs of deterioration like discoloration, fading, or brittleness. If you notice any issues, consult a professional conservator for advice on restoration or preservation techniques. When handling the paper for display or exhibition, wear clean white cotton gloves to minimize the risk of oils or dirt transferring onto the delicate surface. These practices help preserve the condition and longevity of your aged paper.
The same preservation and handling techniques apply to self-made vintage paper as well.