Making paper with kids is a fun and educational activity that promotes sustainability by reusing old paper. With a few simple supplies, kids can learn how to create paper from start to finish, from preparing the pulp to forming and drying the sheets. They can also add their creative touches by incorporating natural materials or colors. This guide provides step-by-step instructions and tips for making paper with kids, Information on the benefits of this activity for child development, and the environment.
If you’re interested in giving your paper crafts a vintage feel, why not check out our guide on how to make paper look old? It’s a fun way to add character to your creations!
How To Make Paper For Kids? – Step-By-Step Guide From Gathering Materials To Finishing
Making paper with kids is a fun and educational activity that promotes creativity and sustainability. Using recycled materials and natural dyes, kids can learn about the importance of reducing waste and protecting the environment while creating unique and personalized paper creations.
Types Of PaperMaking
The two main types of paper making are homemade and recycled. Homemade papermaking involves creating a pulp from raw materials like cotton or linen fibers, using a mold and deckle to make paper. Recycled papermaking involves collecting used materials, processing them into pulp, and then using the pulp to create new paper.
Homemade Paper Making

Homemade paper making involves creating a pulp from raw materials like cotton or linen fibers, then using a mold and deckle to shape the paper.
Recycled Material Paper Making
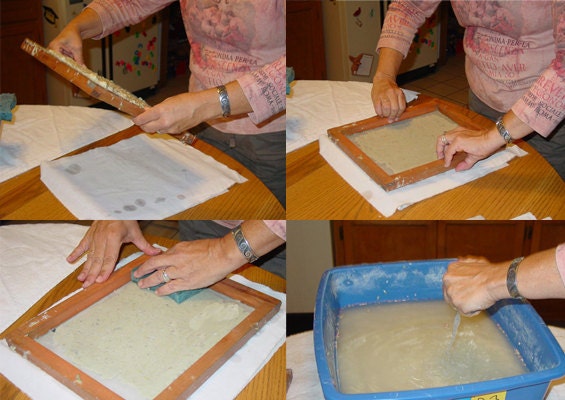
Recycled material paper making involves collecting used materials, processing them into pulp, and then using the pulp to create new paper.
The method of collecting material is different, but making paper is similar.
Materials Needed for Making Paper with Kids
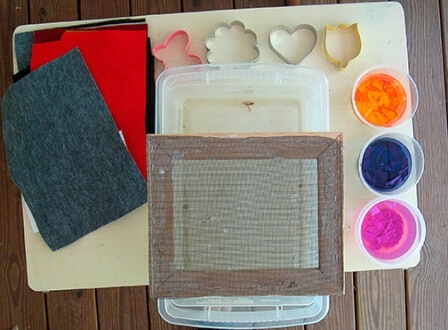
Here’s a breakdown of the necessary supplies for making paper with kids, along with some alternatives and substitutions:
Supplies | Description | Alternatives/Substitutions |
Recycled paper | Used paper that has been shredded or torn | Junk mail, newspaper, tissue paper, paper bags, cardboard |
Water | Plain tap water or filtered water | Rainwater, pond water, river water, recycled greywater |
Blender or food processor | Used to blend the paper into a pulp | Mortar and pestle, hand-cranked paper shredder, hand mixer |
Large bowl or bucket | Used to hold the paper pulp | Plastic container, washtub, trash can |
Fine mesh screen | Used to strain and shape the paper pulp into sheets | Window screen, cheesecloth, netting, old picture frame |
Wooden frame or deckle | Used to mold the paper pulp into desired shape and thickness | Picture frame, embroidery hoop, wire mesh |
Sponge or cloth | Used to absorb excess water from the paper sheets | Old towels, rags, squeegee, newspaper |
Optional add-ins | Natural dyes, flower petals, glitter, seeds, etc. | Fresh herbs, spices, leaves, food coloring, recycled materials |
Note that the alternatives and substitutions listed are incomplete, and other materials may be used. Additionally, some of these materials may require adult supervision or assistance when used by children. |
Looking for a fun and creative craft project for kids? Read our guide about making a paper crown! It’s a simple and enjoyable activity that allows children to express their creativity while also developing fine motor skills.
Collecting and Preparing Recycled Materials
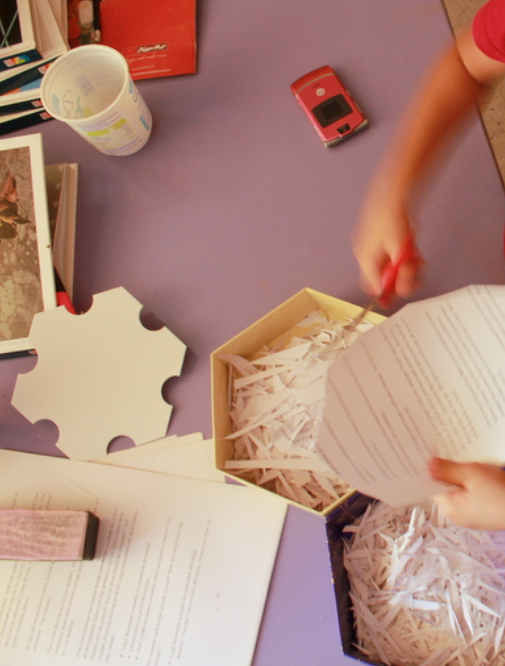
When making paper from recycled materials, the first step is to collect and prepare the materials. For paper, you’ll want to choose types of paper that are suitable for recycling, such as printer paper, newspaper, and cardboard. It’s important to remove any contaminants from the recycled paper, such as staples, tape, or glue, which can be done by hand or with the help of a machine. Other materials, such as plant fibers, must be properly prepared before they can be used for papermaking.
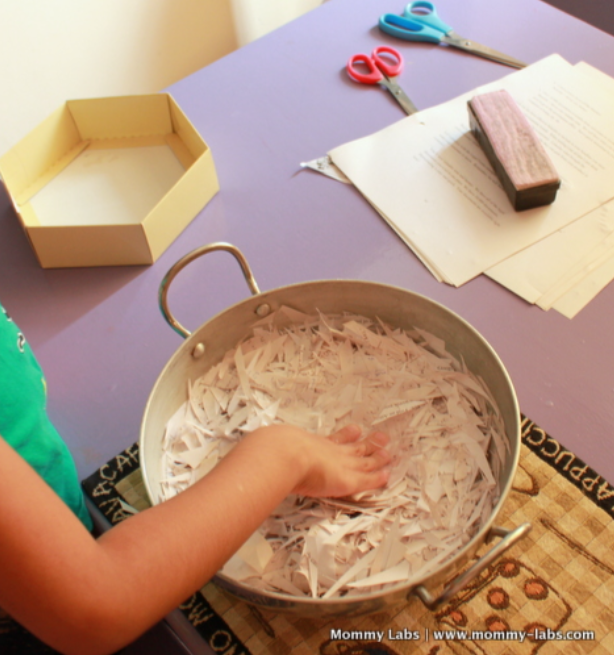
Preparing the Paper Pulp
Here’s a breakdown of the steps for preparing the paper pulp, presented in a way that kids can easily understand:
Shredding or tearing recycled paper
Collect old paper such as junk mail, newspaper, or cardboard b. Tear or cut the paper into small pieces c. Place the paper pieces into a blender or food processor (with adult supervision) and pulse until the paper is broken down into small fibers d. Alternatively, use a hand-cranked paper shredder or a mortar and pestle to shred the paper by hand
Soak and agitate the paper
Transfer the pulp to a large bowl or bucket b. Add enough water to cover the paper pulp and stir well c. Let the mixture sit for at least 30 minutes to an hour, stirring occasionally d. After soaking, use a whisk or wooden spoon to agitate the mixture and break up any clumps
Alternatives to using recycled paper pulp
Instead of using recycled paper, use natural materials like flower petals, leaves, or grass b. Another option is to use cotton or linen fibers purchased online or at a craft store c. Some stores also sell pre-made paper pulp, which can be used as a substitute for homemade pulp
Adult supervision may be required for some of these steps, especially when using a blender or food processor. It’s important to ensure kids understand these tools’ safety precautions and potential risks.
If you enjoyed making paper and want to explore more creative projects, you can try your hand at paper mache. It’s a fun and easy craft that uses simple household ingredients like paper, flour, and water. Check out our guide on how to make paper mache for step-by-step instructions and unleash your creativity!
Making a Simple Paper Mould and Deckle

here’s a breakdown of the steps for making a simple paper mold and deckle, along with the necessary materials.
a. Materials needed:
- Wooden frame (such as a picture frame) slightly larger than the size of the paper you want to make
- Fine mesh screen (such as window screen or netting)
- Staple gun or nails and hammer
- Scissors or utility knife
b. Constructing the mold and deckle:
- Remove any backing, glass, or other materials from the wooden frame and ensure clean and dry.
- Cut a piece of fine mesh screen to size, leaving about an inch excess on all frame sides.
- Lay the screen flat on a table or other surface.
- Place the frame over the screen, ensuring the mesh is centered and the excess is folded up around the edges of the frame.
- Use a staple gun, nails, and hammer to secure the mesh to the frame, starting in the center and working outward. Ensure the mesh is tight and taut to avoid any sagging or wrinkles.
- Use scissors or a utility knife to trim away any excess screen around the edges of the frame.
- The frame with mesh is now your “mold and deckle” and is ready to be used for making paper.
Note that if you don’t have a wooden frame, you can use a plastic container, embroidery hoop, or wire mesh to create your mold and deckle. Ensure the mesh is securely fastened to the frame to avoid tearing or shifting during paper-making. |
Forming and Drying the Paper
We placed butter paper on the mesh and pressed it down to cover the pulp from corner to corner.
We placed a box almost the same size as the inside of the mesh tray over the butter paper.
Here’s a breakdown of the steps for forming and drying the paper:
a. Dip or pour method for paper formation:
- Place the wooden frame over the fine mesh screen, making sure it’s secure and level.
- Dip the frame into the paper pulp and water mixture container, ensuring the entire frame is submerged.
- Slowly lift the frame out of the container, letting the excess water drip off.
- Use the wooden spoon to spread the pulp evenly over the screen, pressing down gently to remove excess water.
- Repeat this process until the desired thickness of the paper is achieved.
b. Pressing and drying the paper:
- Once the paper has been formed on the screen, gently press a towel onto the surface to remove any remaining water.
- Carefully peel the paper off the screen and place it on a flat surface to dry completely.
- Allow the paper to dry for several hours or overnight, depending on the thickness of the paper and the humidity in the air.
- Optional: place the paper between two sheets of clean cloth and press it with a heavy object, like a book, to flatten it and remove any wrinkles.
Note that it’s important to let the paper dry completely before attempting to remove it from the screen or add any embellishments or decorations. Also, use safe and non-toxic materials when working with children. |
Adding Color and Texture to the Paper
Here’s a breakdown of the steps for adding color and texture to the paper:
a. Using natural dyes and pigments:
- Mix a natural dye or pigment with water to create a colored solution.
- Add the colored solution to the paper pulp and water mixture before forming the paper.
- Alternatively, dip the formed paper into the colored solution and allow it to soak for a few minutes.
- Gently squeeze out excess water and allow the paper to dry completely.
b. Incorporating plant fibers or other materials:
- Gather materials such as flower petals, leaves, grass, or other natural items.
- Add the materials to the paper pulp and water mixture before forming the paper.
- Alternatively, sprinkle the materials onto the wet paper surface after forming and press them down gently.
- Allow the paper to dry completely.
c. Creative ideas for customizing the paper:
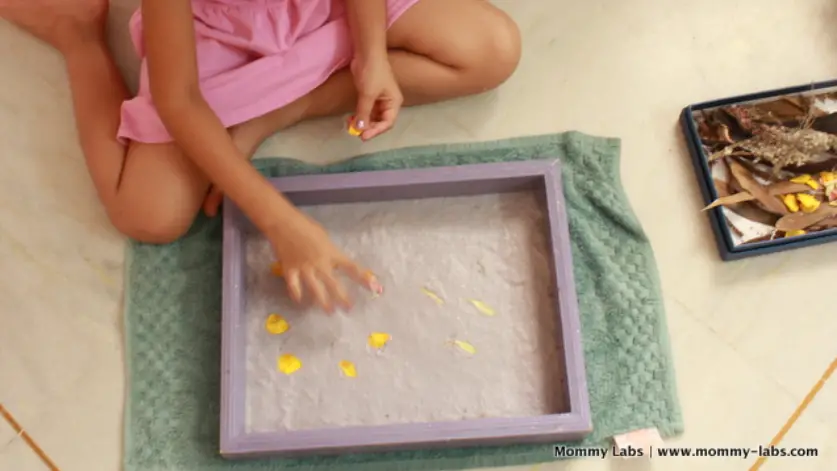
- Use rubber stamps or stencils to create patterns or designs on the wet paper surface.
- Add glitter or confetti to the paper pulp or sprinkle it onto the wet paper surface.
- Use scissors or paper punches to create interesting shapes and edges on the paper.
- Layer different colors and textures of paper to create a collage effect.
Remember to experiment and have fun with different materials and techniques to create unique and personalized paper creations! |
Finishing Touches and Uses for Homemade Paper
Here’s a breakdown of the steps for finishing touches and uses for the homemade paper:
a. Cutting and trimming the paper:
- Use scissors or a paper cutter to trim the edges of the paper and create even shapes.
- Cut the paper into desired sizes and shapes for various projects and activities.
b. Possible projects and activities using homemade paper:
- Create handmade cards, invitations, and stationery.
- Make paper beads or origami shapes.
- Use the paper as wrapping or packaging material.
- Create personalized journals or scrapbooks.
- Make paper garlands or decorations for parties and events.
c. Storing and preserving the paper:
- Store the paper in a cool, dry place to prevent moisture damage.
- Avoid exposing the paper to direct sunlight or extreme temperatures.
- To preserve the paper, consider laminating or framing it to prevent fading or tearing.
Remember to have fun and experiment with different techniques and materials to create unique and beautiful homemade paper creations! |
Discover the art of crafting Paper Tissue Flowers with our easy-to-follow guide. Whether you’re a beginner or a seasoned crafter, creating these delicate blooms is simple and enjoyable. Dive into our step-by-step tutorial to unleash your creativity and adorn your space with vibrant, handmade blossoms.
Tips and Best Practices For Making Paper
It’s important to remember safety when making paper from recycled materials, as you will be working with water and pulp. Wearing gloves and protective eyewear is recommended. Common problems that may arise include uneven paper formation or tearing, which can be addressed by adjusting the pulp consistency or pressing the paper more carefully. Many online tutorials and communities are dedicated to papermaking and recycling, which can be helpful resources for learning more about the process.
Conclusion – Your Paper Is Ready With Your Kid Collaboration
Making paper with kids is a fun and creative activity that teaches them about recycling and sustainable practices. Using simple materials and techniques, children can create unique and personalized paper creations while developing their fine motor skills and creativity. So, grab some recycled paper and start your paper-making adventure!
