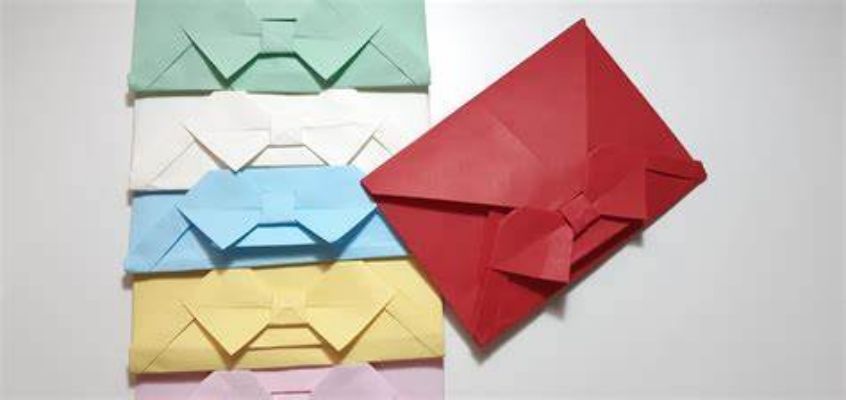
In a world filled with digital communication, there’s something undeniably special about receiving a personalized and handcrafted envelope. Enter origami envelopes, the perfect blend of creativity and functionality. These miniature masterpieces add a unique touch to your letters and gifts and showcase your skills and thoughtfulness. Whether you’re an origami enthusiast or a complete beginner, this blog post will guide you through the art of folding origami envelopes step by step. From choosing the right paper to exploring creative variations and adding personal touches, you’ll discover a world of possibilities to make your envelopes truly one-of-a-kind. So, gather your materials, and let’s embark on a journey of folding origami envelopes that will delight both the sender and the receiver.
If you dont want to use paper as an alternative, then go for aluminum foil, which can also give you the best results.
Looking to add an extra touch to your folded origami envelopes? Learn how to make an easy origami rose with just a few simple folds. Check out our guide for step-by-step instructions!
Gathering the Materials for Your Origami Envelopes
Here’s a chart outlining the materials needed for folding origami envelopes, their usage, and alternative options:
| Material | Usage | Alternative Options |
| Origami Paper | The main material for folding the envelopes | Scrapbooking paper, gift wrapping paper |
| Scissors | Trimming paper or adjusting envelope flaps | Craft knife, paper cutter |
| Ruler | Achieving precise measurements | Folding bone, straight edge |
| Decorative Items | Personalizing and embellishing envelopes | Stamps, stickers, washi tape, ribbons |
| Calligraphy pens, dried flowers |
Choosing the Right Paper For Origami Envelopes
Choosing the right paper for origami envelopes is crucial to ensure successful folding and visually appealing results. Here are some factors to consider when selecting the paper:
- Opt for a paper that is thick enough and thick enough. Heavy cardstock may be challenging to fold, while extremely thin paper might tear easily. Aim for a medium-weight paper that is sturdy enough to hold its shape but still pliable for folding.
- Consider the texture of the paper to add visual interest to your envelopes. Smooth, matte or textured options are available. Textured paper can provide a tactile element to your envelopes, while smooth paper offers a clean and polished look.
- Choose paper that matches your style or the occasion you’re creating the envelopes. Solid colors provide a classic and elegant look, while patterned paper can add a touch of whimsy or sophistication. Consider the recipient’s preferences and the envelope’s purpose when selecting patterns or colors.
- Ensure the paper is square-shaped, ideal for folding origami envelopes. Traditional origami paper is often pre-cut into squares, but if you’re using other types of paper, you may need to trim it to achieve the desired square shape.
- Don’t limit yourself to traditional origami paper. Experiment with different types of paper, such as scrapbooking paper or gift wrapping paper, as long as they are square-shaped and suitable for folding.
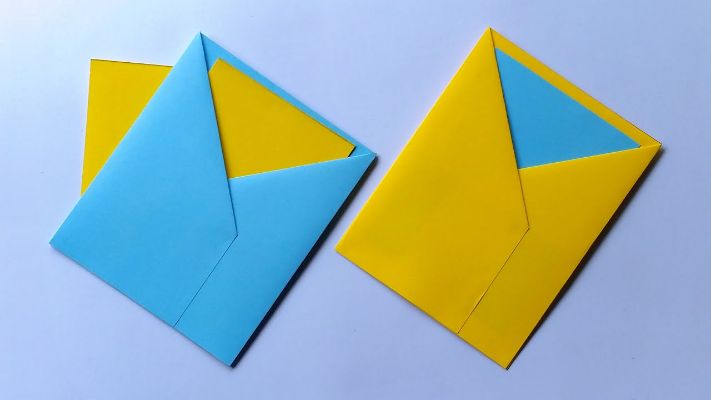
Basic Origami Envelope Fold – Step-By-Step Guide For Kids
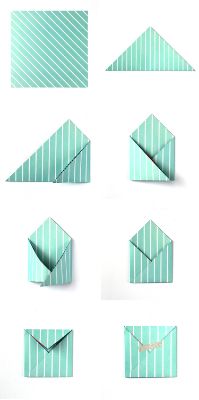
The basic origami envelope fold is a fundamental technique that forms the foundation for creating origami envelopes. Follow these step-by-step instructions to fold a basic origami envelope:
- Start with a square sheet of origami paper. If you use rectangular paper, fold one corner diagonally to create a square shape, then trim off the excess.
- Place the paper with the colored or patterned side facing down (if applicable). Fold the square in half horizontally, bringing the bottom edge up to meet the top edge. Crease the fold firmly and unfold it.
- Next, fold the square in half vertically, bringing the right edge over to meet the left edge. Crease the fold and unfold it.
- Rotate the paper 45 degrees counterclockwise so it forms a diamond shape. Fold the bottom corner of the diamond up towards the center point, aligning it with the top corner. Crease the fold firmly and unfold it.
- Fold the top corner of the diamond down towards the center point, aligning it with the bottom corner. Crease the fold firmly and leave it folded.
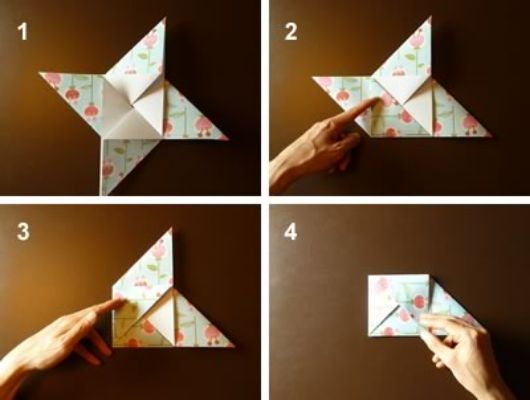
- Take the right corner and fold it diagonally towards the center point, overlapping the previous fold slightly. Crease the fold firmly and unfold it.
- Repeat the previous step with the left corner, folding it diagonally towards the center point and overlapping the previous fold.
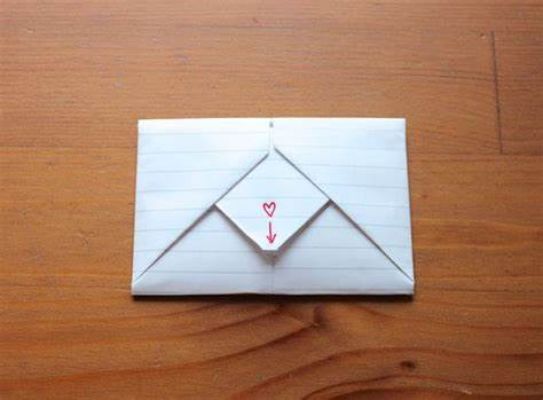
- With the left and right corners still folded, fold the bottom corner towards the top point, tucking it under the flaps created in the previous steps. This forms the base of the envelope.
- Fold the top flap down over the base, aligning it with the bottom edge. Adjust the folds and creases to create neat and straight edges.
- Finally, tuck the bottom flap inside the pocket created by the top flap. Make sure it is securely tucked to hold the envelope closed.
Learn how to elevate your crafting skills with our guide on folding origami envelopes! Want to add a heartfelt touch to your creations? Check out our easy tutorial on how to make a heart out of a gum wrapper for charming embellishments.
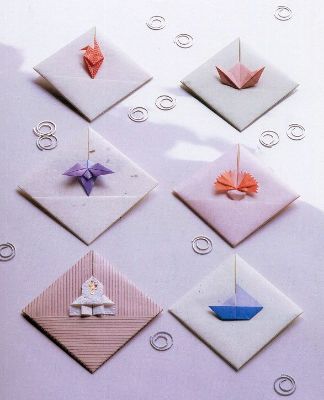
Creative Variations in Origami Fold For Envelop Shape
Here are five creative variations for origami envelopes:
Window Cutouts: Instead of sealing the envelope completely, cut out a window shape on the front flap. This allows for a sneak peek of what’s inside the envelope, adding an element of curiosity and anticipation.
Origami Pockets: Create additional pockets within the envelope by folding and tucking paper sections. These pockets can hold small notes, trinkets, or even surprise messages for the recipient.
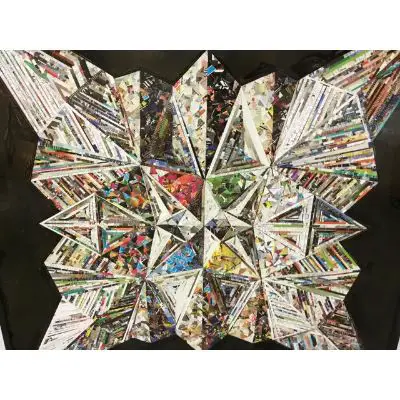
Mixed Media Collage: Combine origami with other art forms by incorporating collage elements. Attach cutouts from magazines, photographs, or decorative papers onto the envelope’s surface, creating a visually dynamic and textured design.
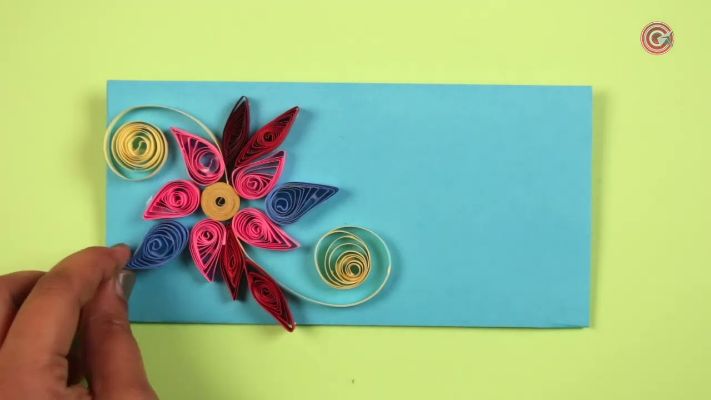
Quilled Paper Accents: Add quilled paper accents to your origami envelopes for elegance and intricacy. Create small quilled shapes, such as flowers, hearts, or spirals, and adhere them to the envelope’s surface.
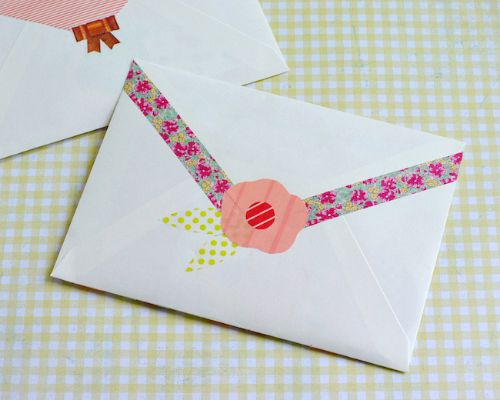
Washi Tape Designs: Enhance the aesthetics of your origami envelopes by incorporating colorful washi tape. Use it to create patterns, borders, or decorative accents on the envelope’s exterior, adding a playful and vibrant touch.

10 Decorating and Personalizing Ideas For Origami
Here are various ideas for decorating and personalizing your origami envelopes:
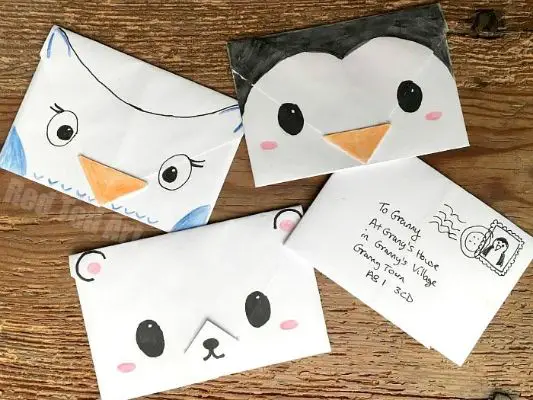
Hand-drawn Designs
Use pens, markers, or colored pencils to draw intricate designs, patterns, or illustrations directly on the surface of the envelope. You can create a unique artwork or add personal touches like the recipient’s name, special symbols, or meaningful quotes.
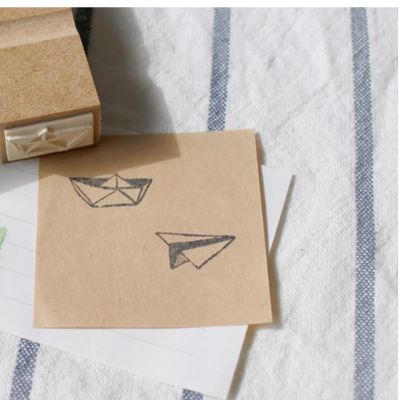
Rubber Stamps
Utilize rubber stamps and ink pads to imprint decorative images, patterns, or messages onto the envelope. Choose stamps that align with the occasion or reflect the recipient’s interests to customize the design further.
Calligraphy: Practice calligraphy or use decorative lettering techniques to write the recipient’s name, a special message, or inspirational quotes on the envelope. This adds an elegant and personalized touch to your creation.

Collage Elements: Cut out images, photographs, or meaningful words from magazines, books, or printed materials. Arrange and glue them onto the envelope’s surface to create a collage that tells a story or reflects the recipient’s interests.
Embossing: Use embossing powder, ink, and a heat tool to create raised and textured designs on the envelope. This technique adds a sophisticated and professional look to your envelope and can be combined with rubber stamps or hand-drawn elements.

Washi Tape and Stickers: Incorporate decorative washi tape or stickers to add colorful patterns, borders, or accents to the envelope. These versatile and readily available materials can instantly elevate the visual appeal of your design.
Ribbons and Bows: Attach small ribbons or bows to the envelope’s closure or as decorative elements on the surface. This adds a charming and festive touch, particularly for special occasions or gift-giving.
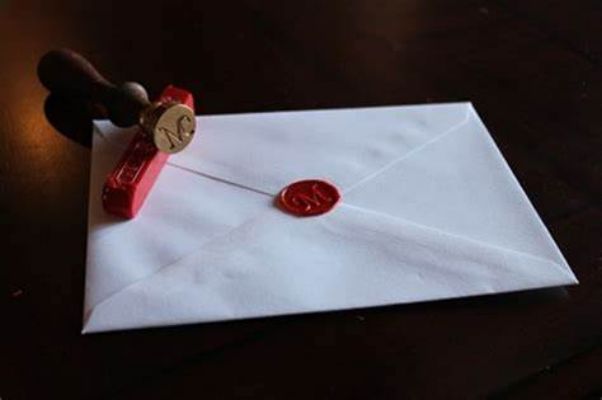
Wax Seals: Use wax seals with personalized stamps or pre-designed seals to add a vintage or sophisticated touch to your envelopes. The melted wax creates a beautiful and secure closure while adding a distinctive aesthetic.
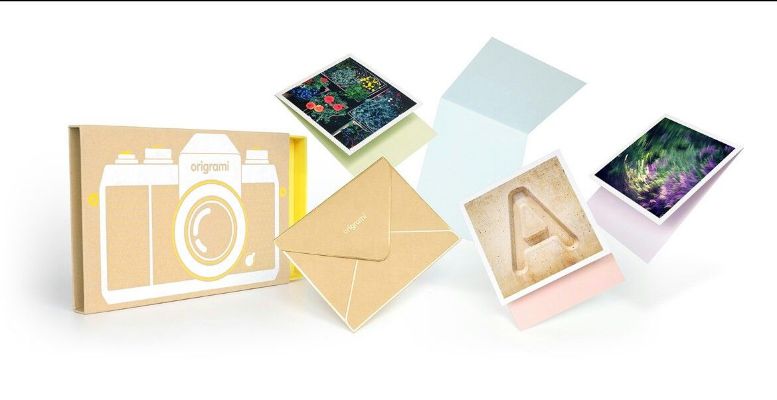
Photos or Polaroids: Attach small photos or polaroids to the envelope, either on the outside as a visual representation of the contents or inside as a cherished memory or surprise for the recipient.
Custom Stickers or Labels: Design and print custom stickers or labels with personalized messages, monograms, or graphics to enhance the envelope’s appearance. These stickers can be used as decorative accents or functional elements for sealing or addressing the envelope.
Looking for more creative activities for your little ones? Explore our article on Thanksgiving crafts for kids for some easy and enjoyable craft ideas perfect for the holiday season.
Where To Use Origami Envelopes?
Origami envelopes serve a wide range of practical purposes beyond their aesthetic appeal. Here are some practical uses for origami envelopes:
- Gift Giving: Origami envelopes are perfect for presenting small gifts such as jewelry, cash, gift cards, or handwritten notes. They add an element of surprise and personal touch to your gift, making giving even more special.

2. Invitations and RSVPs: Origami envelopes can create unique and eye-catching invitations for special occasions like weddings, parties, or events. You can write or print the event details on a small card and tuck it neatly inside the envelope. Additionally, they work well for RSVP cards, providing recipients a charming and interactive way to respond.

3. Love Notes and Letters: Sending a heartfelt message or a love note becomes even more meaningful when enclosed in a beautifully folded origami envelope. The extra effort put into creating the envelope shows the recipient that you truly care and adds an element of surprise and delight when they open it.
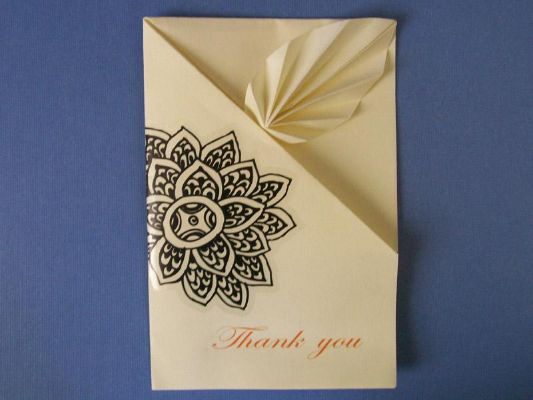
4. Thank You Cards: Express your gratitude with a personalized touch using origami envelopes for thank you cards. Fold a heartfelt note of appreciation, tuck it into the envelope, and present it to someone deserving of your thanks. The unique presentation will make your gratitude stand out.
5. Organization and Storage: Origami envelopes can be practical organizers for small items. Use them to store business cards, receipts, coupons, or even small craft supplies. By folding envelopes of different sizes and labeling them, you can create an organized system for keeping track of various items.
6. Travel Keepsakes: When traveling, origami envelopes can collect and store mementos such as tickets, postcards, or pressed flowers. Folding envelopes on the go allows you to create a personalized travel journal that captures your memories in a compact and visually appealing way.
What Are The 5 Basic Origami Folds?
The art of origami involves various folding techniques that can be combined to create intricate and beautiful paper designs. Here are five basic origami folds that serve as the building blocks for many origami creations:
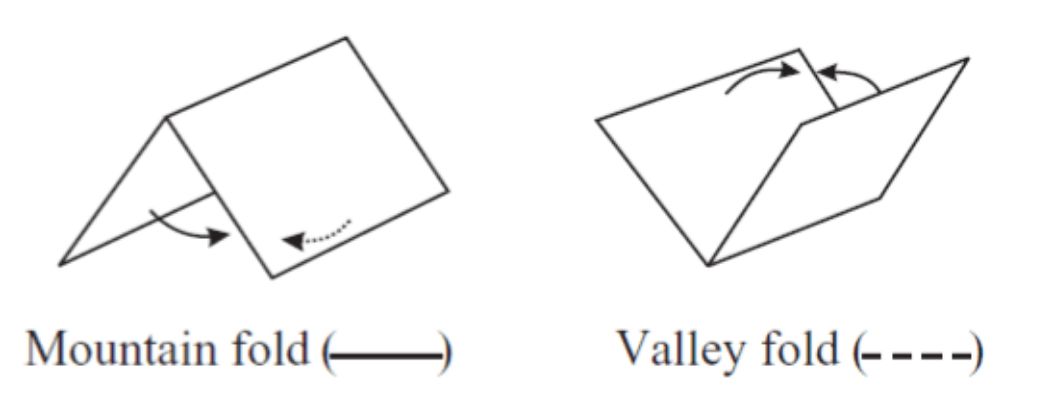
Valley Fold
A valley fold is origami’s most common and straightforward fold. It involves folding the paper inward, creating a “V” shape or a valley. To make a valley fold, bring the opposite edges of the paper together, align them, and then crease along the fold line.
Mountain Fold
The mountain fold is the reverse of the valley fold. It creates a raised or “mountain” shape on the paper. To make a mountain fold, fold the paper outward, away from you, and crease along the fold line. The mountain fold often creates sharp corners or angles in origami models.
Squash Fold
The squash fold is a technique used to flatten and spread out a section of paper. It involves opening up a pocket or flap and pressing it flat. To make a squash fold, carefully unfold a portion of the paper, flatten it while maintaining the desired shape, and refold it.
Reverse Fold
The reverse fold is a technique used to change the direction of a fold or create a specific shape. It involves folding a paper section opposite to the previous fold. To make a reverse fold, unfold a previous fold partially or completely, flip the paper over if necessary, and then fold the desired section in the opposite direction.
Sink Fold
The sink fold creates pockets or recessed areas within the paper. It involves folding a portion of the paper inward and pressing it flat. To make a sink fold, create preliminary folds and then manipulate the paper by tucking sections inward to form the desired shape.

Troubleshooting and Tips For Folding Origami Envelopes
While folding origami envelopes can be an enjoyable experience, you may encounter some challenges along the way. Here are some common troubleshooting tips and helpful suggestions to overcome difficulties and enhance your origami envelope folding skills:
Accurate Folding
Precision is key in origami. Ensure your folds are crisp and aligned with the guidelines or previous folds. Use a ruler or a folding bone to create sharp and straight creases. Taking your time and paying attention to details will result in a neater and more professional-looking envelope.
Paper Selection
- Choose the right paper for your skill level and the desired outcome.
- If you’re a beginner, start with medium-weight origami paper that is easier to fold.
- Avoid using paper that is too thick or too thin, as it may make the folding process challenging or compromise the structural integrity of the envelope.
Practice Folding Techniques
Origami envelopes involve various folding techniques. If you’re new to origami, practicing each fold separately before folding the entire envelope is helpful. This allows you to familiarize yourself with the techniques and gain confidence in executing them correctly.
Crease and Flatten
Ensure that your folds are well-creased and flattened. Press down firmly along the fold lines using your fingers, a bone folder, or the back of a spoon. Properly creasing and flattening the paper will help the envelope hold its shape and maintain its structure.
Troubleshoot Uneven Flaps
If your envelope flaps don’t align perfectly or you are having trouble tucking them inside, ensure you’re folding accurately and that your creases are well-defined. Adjust the folds and gently manipulate the paper to create symmetrical flaps.
Experiment and Learn from Mistakes
Don’t be discouraged by mistakes or imperfections. Origami is a learning process, and even experienced folders make errors. Embrace the journey and use mistakes as opportunities for growth. Analyze what went wrong, adjust your approach, and try again. With practice, you’ll improve your skills and achieve better results.
Seek Inspiration
Explore origami books, websites, or video tutorials for inspiration and guidance. There are numerous resources available that offer step-by-step instructions, tips, and troubleshooting techniques. Learning from experienced folders and observing their techniques can provide valuable insights and help you refine your folding skills.
FAQs
What is the hardest origami?
The “Super-Complex” origami models, which require advanced folding techniques and intricate designs, are considered the most challenging and difficult to fold.

What is the most famous origami?
The origami crane (or “tsuru”) is widely regarded as the most famous origami model. It holds cultural significance in Japan and is recognized globally as a symbol of peace and hope.
If you enjoy crafting, you might also be interested in making paper tissue flowers. These delicate creations are easy to make and add a charming touch to any space. check out our guide on how to make paper tissue flowers to get started!
Conclusion
Origami envelopes offer a delightful blend of practicality and artistic expression. Whether folding them for gift-giving, organizing, or personalizing messages, these folded creations add a touch of elegance and thoughtfulness to your gestures. With the basic fold mastered, you can explore endless possibilities, troubleshoot challenges, and refine your skills. Embrace the joy of origami envelopes, and let your creativity soar as you bring paper to life in beautiful and functional ways. Happy folding!