Welcome to the captivating world of wire wrapping stones, where creativity and craftsmanship unite to transform raw materials into stunning works of art. Whether you’re a beginner eager to learn the basics or an experienced wire wrapping enthusiast seeking to refine your skills, this comprehensive guide is designed to cater to all levels of expertise.
Wire wrapping stones is a versatile and time-honored technique that combines gemstones’ natural beauty and wire manipulation’s artistry. It offers endless possibilities for creating unique jewelry pieces, from elegant pendants and intricate earrings to statement rings. With its rich history and widespread popularity, wire wrapping has become a beloved craft for jewelry makers, artisans, and professionals.
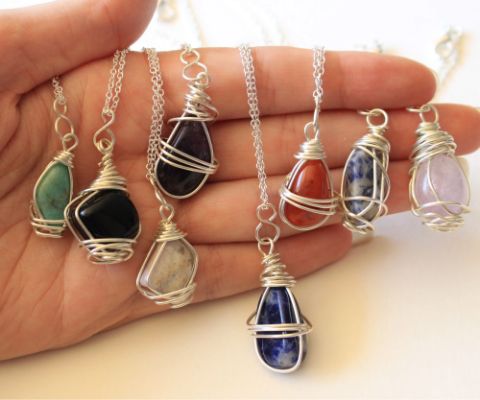
This blog post will delve into the fundamentals of wire wrapping stones, covering essential techniques, tools, and materials. Whether you’re seeking step-by-step instructions for beginners or advanced wire wrapping techniques to challenge your skills, this guide has you covered. Join us on this artistic journey as we explore the art of wire wrapping and unlock the boundless creative potential it holds.
Choosing the Right Stones Before Wire Wrapping Stones
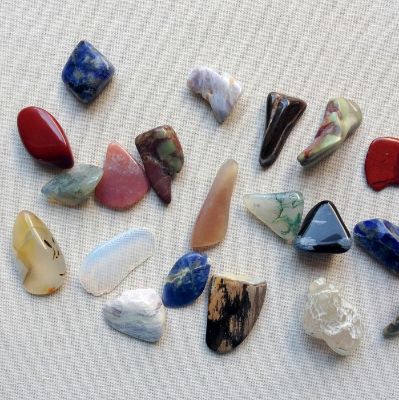
Choosing Stones for Beginners

When starting your wire wrapping journey, it’s essential to select stones that are suitable for beginners. Here are some factors to consider:
- Size: Opt for smaller stones that are easier to handle and wrap. They provide better control during the wire wrapping process.
- Shape: Begin with stones that have simple shapes, such as rounds, ovals, or teardrops. These shapes are more forgiving and easier to wrap than irregularly shaped stones.
- Hardness: Select stones of 6 or higher on the Mohs scale. Softer stones are more prone to scratches and may not withstand wire-wrapping.
- Smooth Surfaces: Look for stones with smooth surfaces, as they are less likely to damage the wire or cause snags during wrapping.
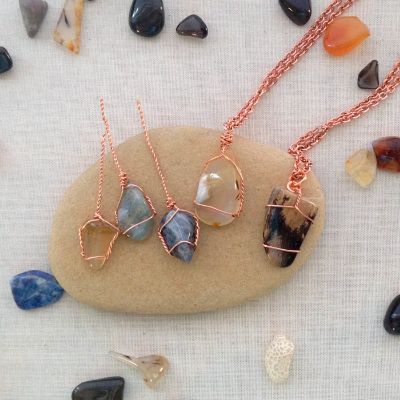
Choosing Stones for Advanced Wire Wrappers
For those with more experience in wire wrapping, the selection of stones can broaden. Consider the following aspects:
- Variety: Explore a wider range of stone types, including faceted gemstones, geodes, druzy crystals, or cabochons. These stones offer unique textures, colors, and visual effects for more intricate designs.
- Unusual Shapes: Experiment with stones that have unconventional shapes, such as freeform or asymmetrical cuts. These stones can challenge your wire wrapping skills and inspire innovative designs.
- Rare and Exotic Stones: Delve into the world of rare and exotic stones, such as opals, moonstones, or larimar. These stones bring a touch of exclusivity and elegance to your wire-wrapped creations.
- Personal Preferences: Consider your style and aesthetic when selecting stones. Choose stones that resonate with you and inspire your creativity.
Essential Tools and Materials For Wire Wrapping Stones
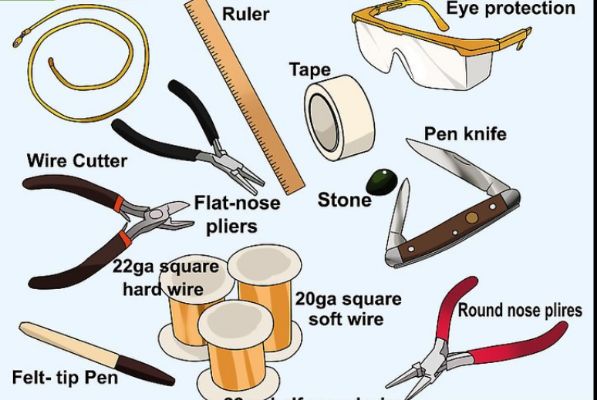
Here’s a chart outlining the essential tools and materials for wire wrapping stones, along with their uses and alternative options:
| Tools and Materials | Uses | Alternatives |
| Jewelry Pliers (Chain Nose, Round Nose, Flat Nose) | Gripping, bending, and shaping wire | Nylon jaw pliers bent nose pliers |
| Wire Cutters | Cutting wire to desired lengths | Flush cutters, nail clippers |
| Mandrels and Dowels | Creating consistent wire loops and shapes | Pen barrels, knitting needles |
| Ruler or Measuring Tape | Measuring wire lengths accurately | Vernier calipers, digital measuring tools |
| Steel Bench Block | Flattening and hammering wire | Anvil, thick ceramic tile |
| Ball Peen Hammer | Texturing and hardening wire | Chasing hammer, rubber mallet |
| Steel Wool or Polishing Pads | Smoothing and polishing wire | Sandpaper, polishing cloth |
| Beading Mat or Tray | Preventing beads and stones from rolling away | Felt cloth, silicone baking mat |
| Wire (Various Gauges and Types) | Creating wire-wrapped designs | Copper wire, craft wire, silver wire |
| Gemstones or Cabochons | Focal points for wire-wrapped jewelry | Glass beads, resin cabochons |
| Jump Rings and Connectors | Connecting components in jewelry designs | Split rings, wire wraps |
| Clasps or Findings | Securing and fastening jewelry pieces | Lobster clasps, magnetic clasps |
| Wire Protectors | Protecting wire from wear and tear | Heat shrink tubing, crimp bead covers |
| Beads, Charms, and Embellishments | Adding decorative elements to wire-wrapped designs | Seed beads, crystals, polymer clay charms |
Basic Stone Wire Wrapping Techniques
Practice these steps with different stones and experiment with variations in wire gauge, wrapping styles, and embellishments to develop your unique style. We are providing instructions for beginners and for advanced levels accordingly.
Step-by-Step Instructions for Beginners:
Gather your materials:
- Stone or bead of your choice
- Wire (recommended gauge: 20-24)
- Wire cutters
- Round nose pliers
- Chain nose pliers
Measure and cut the wire:
- Start with a wire length of approximately three times your stone’s height.
- Use wire cutters to trim the wire to the desired length.
Create a wire loop:
- Hold the wire about 1 inch from one end using round nose pliers.
- Bend the wire over the pliers to form a 90-degree angle.
- Reposition the pliers to the top of the bend and continue bending the wire around one of the pliers’ jaws, creating a loop.
Position the stone:
- Slide the stone through the wire loop, allowing it to rest in the center.
Secure the wire:
- Hold the wire ends firmly with chain nose pliers, ensuring they are parallel.
- Wrap one wire end tightly around the other wire, making multiple wraps to secure the stone in place.
- Trim any excess wire using wire cutters and chain nose pliers to tuck the cut end against the wrapped wire to prevent sharp edges.
Shape the wire:
- Hold the wire wraps with chain nose pliers and gently shape them to your desired design. You can create swirls, spirals, or other decorative elements.
Finishing touches:
- Use chain nose pliers to adjust and straighten wire wraps or loops.
- Check the stone’s stability and make additional wraps or adjustments to hold it securely.
Optional embellishments:
- You can add beads, charms, or wire wraps to enhance the desired design.
- Slide beads onto the wire before wrapping, or attach small charms to the wire loops using jump rings.
Final adjustments:
- Take a moment to examine your wire-wrapped stone and make any final adjustments to the shape, positioning, or wraps to achieve your desired aesthetic.
Step-by-Step Instructions for Advanced Wire Wrapping
Gather your materials:
- Stone or bead of your choice
- Wire (recommended gauge: 18-22)
- Wire cutters
- Round nose pliers
- Chain nose pliers
- Flat nose pliers
- Optional: Beads, charms, or additional wire for embellishments
Measure and cut the wire:
- Determine the length of wire needed by wrapping it around the stone or bead, leaving enough extra for wrapping and embellishments.
- Use wire cutters to trim the wire to the desired length.
Create a wireframe:
- Hold the wire about 1 inch from one end using round nose pliers.
- Bend the wire over the pliers to form a 90-degree angle.
- Reposition the pliers to the top of the bend and continue bending the wire around one of the pliers’ jaws to form a partial loop.
- Reposition the pliers to the bottom of the partial loop and continue bending the wire around the opposite jaw to complete the loop, forming a teardrop shape.
Position the stone and secure the wire:
- Slide the stone into the wireframe, positioning it in the center.
- Hold the wire ends firmly with chain nose pliers, ensuring they are parallel.
- Wrap one wire end tightly around the other wire, making multiple wraps to secure the stone in place.
- Trim any excess wire using wire cutters and chain nose pliers to tuck the cut end against the wrapped wire.
Create decorative wire elements:
- Flat nose pliers bend and shape the wire around the stone, creating decorative elements such as spirals, curls, or loops.
- Experiment with different wrapping patterns and techniques, incorporating the wireframe and stone to form intricate designs.
- Optional: Add beads, charms, or wire wraps to enhance the design. Slide beads onto the wire before wrapping or attach them using jump rings.
Finishing touches:
- Use chain nose pliers to adjust and straighten wire wraps or loops.
- Check the stone’s stability and make additional wraps or adjustments to hold it securely.
Final adjustments and polishing:
- Take a moment to examine your wire-wrapped stone and make any final adjustments to the shape, positioning, or wraps to achieve your desired aesthetic.
- If desired, polish the wire using steel wool or polishing pads to achieve a smooth and shiny finish.
Finishing and Polishing
Finishing and polishing are crucial steps in wire wrapping to give your creations a professional and polished appearance. Here’s how you can finish and polish your wire-wrapped stones:
Cleaning the Wire-Wrapped Piece:
- Before polishing, ensure your wire-wrapped piece is free from dirt, oils, or residues. Use a soft, lint-free cloth or a jewelry-cleaning solution to gently clean the wire and the stone.
Polishing the Wire:
- Use steel wool or polishing pads specifically designed for metal to polish the wire. Rub the steel wool or pad gently along the wire’s surface in even strokes, following the wire’s direction.
- Pay attention to rough or uneven areas, ensuring they are smooth during polishing.
- Continue polishing until the wire achieves the desired level of shine and smoothness.
Polishing the Stone:
- If the stone is not sensitive to water, use a mild jewelry cleaner or warm soapy water. Gently scrub the stone using a soft brush, such as a toothbrush, to remove any dirt or debris.
- Rinse the stone thoroughly with clean water and dry it with a soft cloth.
- If the stone is sensitive to water, use a dry, soft cloth to wipe away any smudges or fingerprints gently.
Applying a Patina or Oxidizing (Optional):
- If you desire an antique or aged look for your wire-wrapped piece, you can apply a patina or oxidizing solution.
- Follow the manufacturer’s instructions for your specific patina or oxidizing solution. Apply the solution to the wire, focusing on the areas where you want the antique effect.
- Allow the solution to sit on the wire for the recommended time, then rinse it off with water and dry the piece thoroughly.
Final Inspection:
- After polishing and any optional treatments, inspect your wire-wrapped piece for imperfections, scratches, or loose wire ends.
- Use your pliers to gently tighten loose wire wraps or make any necessary adjustments to ensure the piece is secure and visually appealing.
Troubleshooting Common Issues While Wrapping Stones
Wire wrapping stones can sometimes present challenges. Here are some common issues you may encounter and their potential solutions:
Wire slipping or coming loose:
- Solution: Ensure you have made enough tight wraps around the stone to secure it. Use chain nose pliers to tighten loose wraps, ensuring the wire is snug against the stone.
Wire wraps not holding the stone securely:
- Solution: Increase the number of wraps or make them tighter for a more secure hold. Consider using a thicker gauge wire for added stability. You can also incorporate wire wraps or decorative elements to secure the stone further.
Uneven or crooked wraps:
- Solution: Pay close attention while wrapping and ensure that each wrap lies flat and evenly spaced. Use chain nose pliers to adjust and straighten any crooked wraps. Practice and patience will improve your technique over time.
Sharp wire ends or rough edges:
- Solution: Wire cutters trim the wire ends as close to the wraps as possible. Use chain nose pliers to press the cut ends against the wrapped wire to prevent sharp edges. You can also gently file or sand any rough edges to ensure a smooth finish.
Wire scratches on the stone:
- Solution: Care when wrapping the wire around the stone to avoid scratching its surface. Consider using nylon jaw pliers or covering the wire with masking tape where it comes into contact with the stone to provide a protective barrier.
Difficulty shaping intricate designs:
- Solution: Practice shaping wire with different tools, such as mandrels, dowels, or specialty wire shaping tools. Experiment with bending, coiling, and weaving techniques to achieve more intricate and precise designs. Additionally, using finer gauge wire may allow for more intricate shapes.
Wire tangling or kinking:
- Solution: Work with shorter lengths of wire to minimize tangling. Straighten kinks in the wire by gently pulling and straightening it with your fingers or using nylon jaw pliers. Proper storage, such as using wire spools or organizers, can also help prevent tangling.
Stone not fitting securely in the wireframe:
- Solution: Ensure the wireframe is properly sized to fit the stone. If the frame is too large, gently bend or shape it to better conform to the stone’s shape. If the frame is too small, create a new one with appropriate dimensions.
Inspiration and Project Wire Wrapping Stones Ideas
We provide project ideas to start your wire wrapping journey. Feel free to adapt and modify them to suit your style and preferences. Let your imagination soar as you explore the endless possibilities of wire wrapping.
10 Wire Wrapping Project Ideas for Beginners
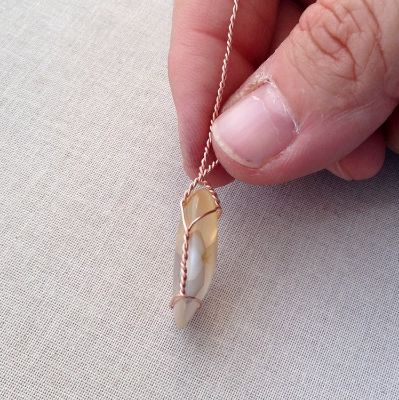
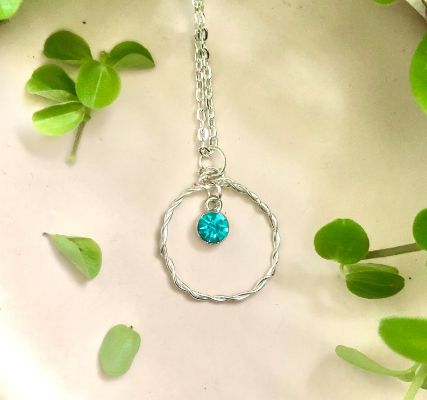
Wire-Wrapped Pendant Necklace: Create a simple wire-wrapped pendant using a beautiful stone or bead, and attach it to a chain or cord to make a stylish necklace.
Wire-Wrapped Earrings: Design and craft your wire-wrapped earrings by wrapping stones or beads and attaching them to earring findings.

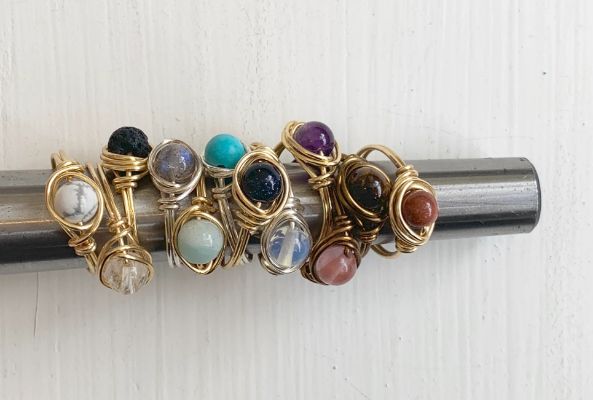
Wire-Wrapped Ring: Make a wire-wrapped ring by creating a unique design around a small stone or bead. Adjust the wire size to fit your finger comfortably.

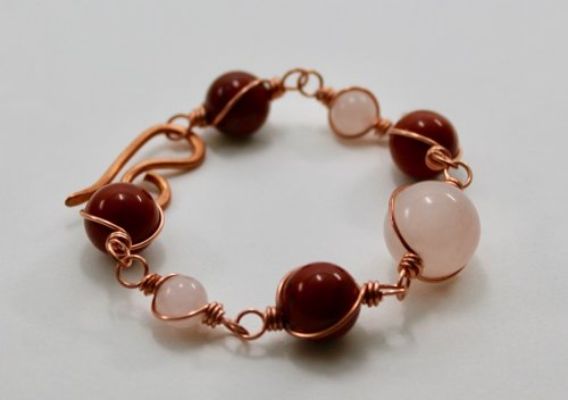
Wire-Wrapped Bracelet: Craft a wire-wrapped bracelet by creating a series of components, such as beads or focal stones, and connecting them with jump rings or wire links.
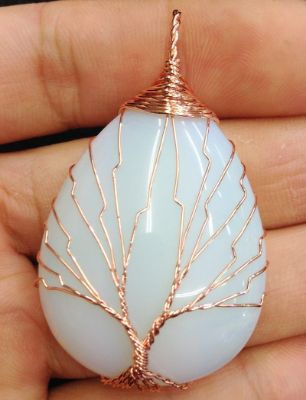
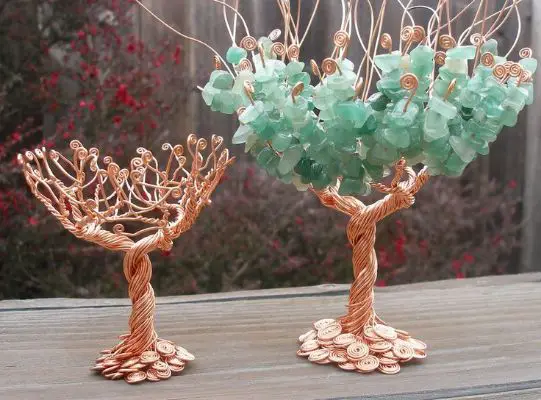
Tree of Life Pendant: Use wire to create a beautiful Tree of Life pendant, incorporating beads or gemstones as leaves.
Wire-Wrapped Keychain: Add a personal touch to your keys by wire-wrapping a small stone or bead and attaching it to a keychain ring.

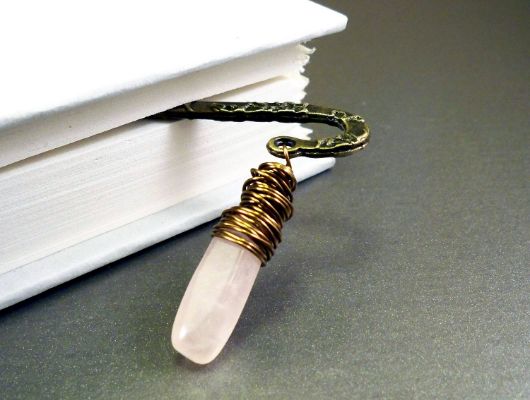
Wire-Wrapped Bookmark: Create a unique bookmark by wrapping wire around a decorative stone or bead and adding charms or tassels.
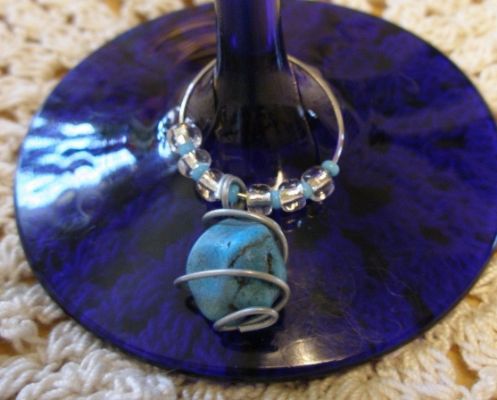
Wire-Wrapped Wine Glass Charms: Make wire-wrapped wine glass charms by wrapping small beads or gemstones with wire and attaching them to hoop-shaped wire hooks.
Wire-Wrapped Birthstone Pendant: Celebrate birthdays by wire-wrapping birthstones and creating personalized pendants for loved ones.
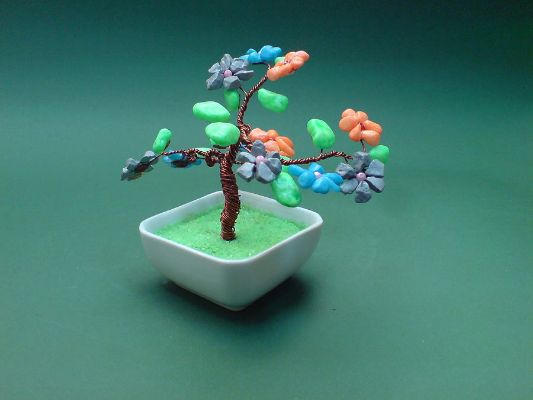
Wire-Wrapped Bonsai Tree Sculpture: Take a creative twist by crafting a wire-wrapped bonsai tree sculpture, using wire to shape the branches and incorporating small beads or gemstones as leaves.
10 Wire-Wrapping Project Ideas for Advanced

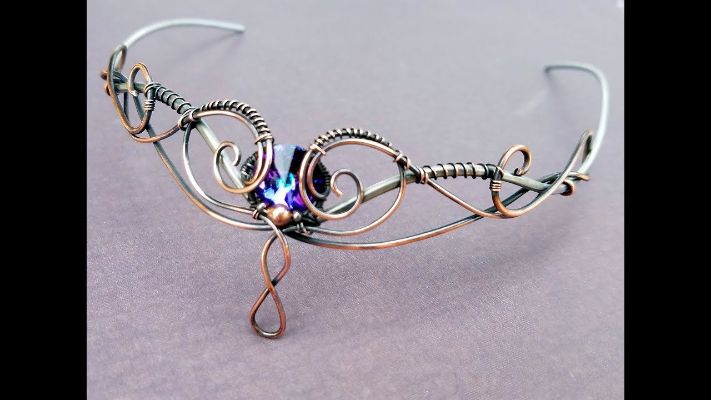
Wire-Wrapped Statement Necklace: Create an intricate statement necklace by combining multiple wire-wrapped components and incorporating various stones, beads, and charms.

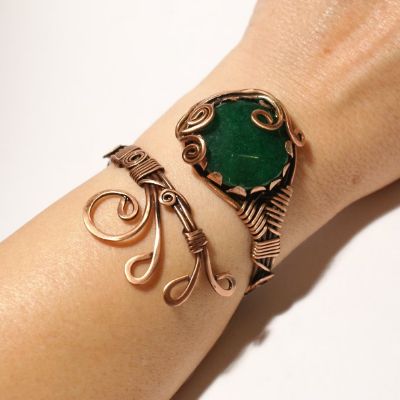
Wire-Wrapped Cuff Bracelet: Design and craft a bold wire-wrapped cuff bracelet, experimenting with different wire patterns and incorporating larger stones or focal beads.
Wire-Wrapped Hair Comb: Create an elegant hair comb by wrapping wire around a comb base and embellishing it with beads, crystals, or gemstones.
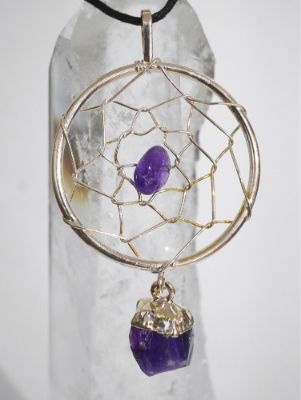
Wire-Wrapped Dreamcatcher Pendant: Use wire to weave and wrap a dreamcatcher-inspired pendant, incorporating beads and feathers for a bohemian touch.
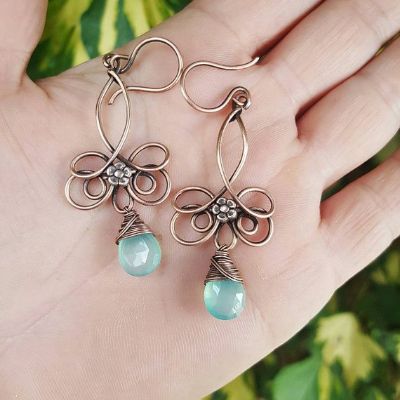
Wire-Wrapped Chandelier Earrings: Craft intricate wire-wrapped chandelier earrings by creating cascading wire designs and incorporating gemstones or crystals.
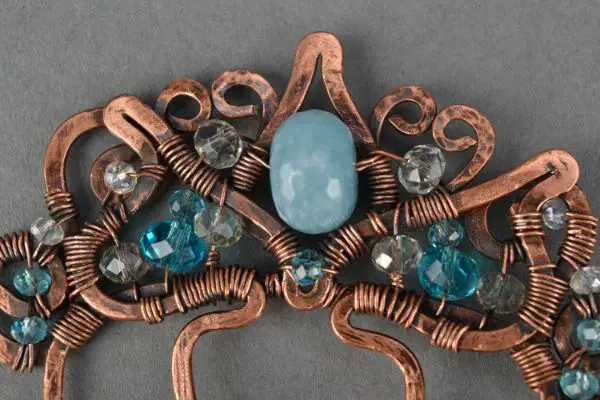
Wire-Wrapped Beaded Tiara: Design and craft a wire-wrapped tiara using wire and beads, perfect for special occasions or costume parties.
Wire-Wrapped Sculptural Art: Explore your creativity by wire-wrapping a sculptural art piece, using wire to create intricate shapes, curves, and forms.

Wire-Wrapped Gemstone Statement Ring: Make a bold statement ring by wire-wrapping a large gemstone with intricate wire designs and adding decorative accents.
Wire-Wrapped Wire Tree Sculpture: Take wire wrapping to the next level by creating a wire-wrapped tree sculpture using various wire gauges to form the branches and incorporating gemstones or beads as leaves.
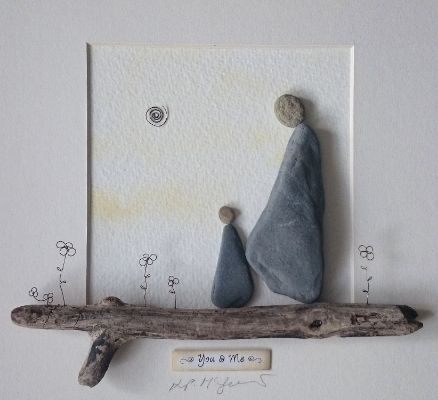
Wire-Wrapped Wall Art: Use wire to create a wire-wrapped wall art piece, experimenting with different wire patterns and colors and incorporating other materials such as driftwood or found objects.
Take Away
Wire wrapping stones are a versatile and creative art form that beginners and advanced practitioners alike can enjoy. You can transform ordinary stones into beautiful jewelry pieces with the right tools, materials, and techniques. Whether you’re just starting or looking to expand your skills, wire wrapping offers endless possibilities for expressing creativity. From simple pendants to intricate sculptures, let your imagination guide you as you embark on your wire-wrapping journey. Enjoy the process and have fun exploring this exquisite craft.