Nail art is a great way to decorate and make your nails look pretty. There are many types of nail art designs that you can try. Some designs are straightforward, while others require more time and effort.
You’ve probably seen the unique designs that people are doing with their nails. You might want to get in on the action, but you need help figuring out where to start. Don’t worry; there are plenty of easy nail designs for kids that you can do yourself.
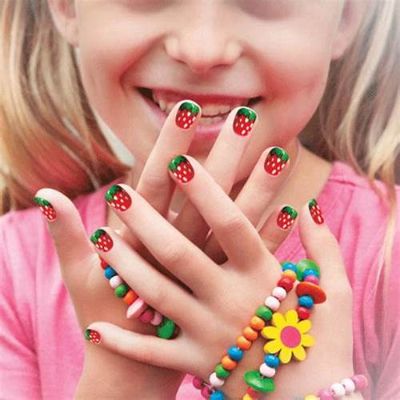
Nail ideas for kids are the best way to make your little one look beautiful and stylish. You can apply nail art designs in different colors and styles on their nails. There are many different designs available in the market which you can choose according to your choice and budget. But it is better to go for natural colors so they don’t look too artificial.
Age Chart For Kids Nails
Nail Art | Age Group |
Flo-Jo Nails | Age: 4+ |
Toe Nail Styles | Age: 4+ |
Nail Art with Fabric | Age: 4+ |
Nail Polish Stamping with a Toothpick | Age: 5+ |
How To Do Cute Short Nails Art For Kids?
The first thing you should do is cut your child’s nails short and make them smooth with a file. You can use any nail polish remover if you want, but it is better not to use it as they may hurt themselves with their sharp nails when they play around with other kids.
There are different ways of painting your child’s nails, like putting a dot of color on each nail or just a single line across all the nails from left to right or vice versa, depending on how much time you have.
You can also put some stickers on top of the nail polish, which makes it look more attractive than just using plain color alone.
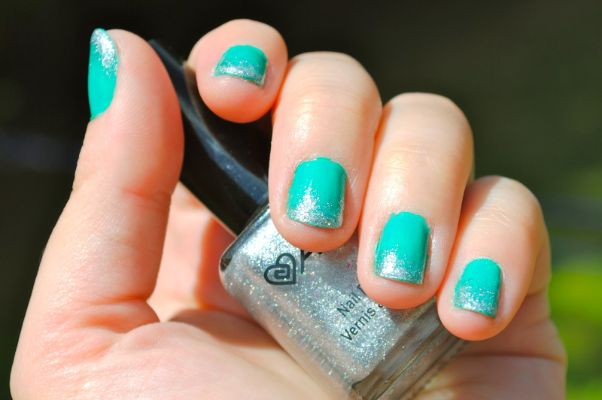
Glittery Nail Polish
Glittering nail polish is another fantastic idea for short nails for kids. Like the previous one, you only need a pair of scissors and glittery nail polish to make it happen. Cut off the excess portion from your kid’s fingernails after applying the glittery nail polish on them entirely so that they look more attractive than ever before!
Chevron with dots
You can draw chevron lines on the top part of your nail and add white dots above them. The white dots will look like snowflakes!
Christmas tree nails
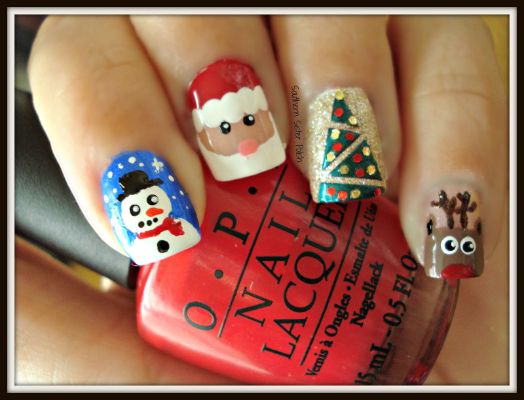
This design is straightforward to do because it only has three steps:
- Paint the base color of your choice on all your nails except one (which will remain bare).
- Draw vertical lines from the cuticle towards the tip using a toothpick dipped in nail polish remover (this will help you create V-shaped gaps between each line).
- Add glitter as desired over these lines so that they become more visible!
Hippie Pattern
This is a super easy design that kids of all ages can do. All you need is light blue nail polish and darker blue nail polish. Paint each nail in a lighter color first, then use a darker color to make the flower pattern on top of those nails. You can even add glitter if you want!
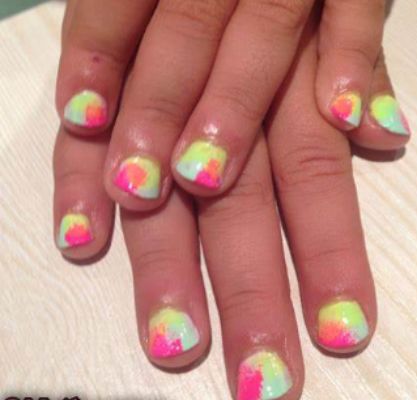
Tie-Dye Nails

Use a sponge to blend different nail polish colors for a tie-dye effect. Tie-dye was popular in the 60s and 70s, so this design is perfect for kids who love retro fashion!
Nail Ideas For Kids At Home For 4 Years Old To 14 Years Old
Chalkboard Nails
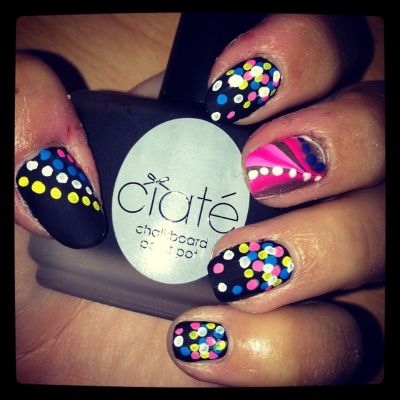
Chalkboard nails are one of the easiest ways to make your nails stand out without too much effort. Just paint your nails with a base color and let them dry completely before using chalkboard paint or nail decals on the tips of the nails. You can even draw on little faces with the chalk and add fun accessories like hats or glasses.
They’re easy to make and only require a few things:
A bottle of white polish
A bottle of black polish
A fine brush (optional)
Method:
- Paint your nails white. Let dry completely.
- Using a toothpick or cotton swab dipped in alcohol, gently remove the excess polish around the edges of each nail. This ensures that when you paint the black design, it won’t bleed into the white background in any spots where there isn’t any color. You can also use a fine brush dipped in alcohol if you prefer a more detailed design or if you want to use more than one color on your chalkboard nails.
- Use the toothpick or cotton swab to pick up some of the black paint and dot it onto your nail (or brush it on). If you want multiple colors on one nail, repeat this process as often as needed until you are satisfied with how many colors you want on each nail.
Splatter nails
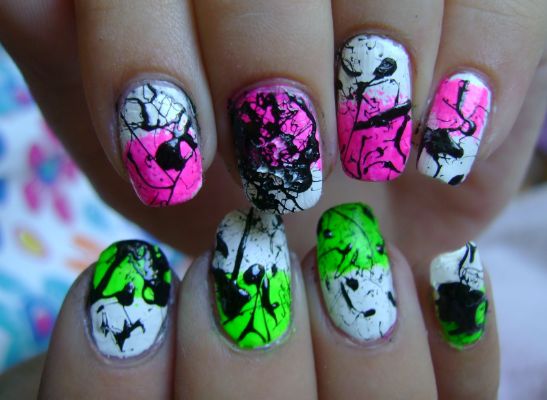
Splatter nails are another simple design that kids will love because they’re so much fun! To create splatter nails, use a toothpick or other small tool to apply a dot of polish onto an old credit card (or any piece of plastic). Then, dip the toothpick into another color and slowly pull it through the drop until it breaks apart into tiny pieces. This will leave behind splattered dots on your nail that look like paint splatters!
Flo-Jo Nails
If you have little girls who love sports, this would be an excellent idea for them. If your child loves track and field or swimming, she’ll love these Flo-Jo-inspired nails!
This is a fun idea that will get your daughter moving! This design consists of two colors: one color on each hand and a third color on the toes – all mixed to create a beautiful rainbow effect!
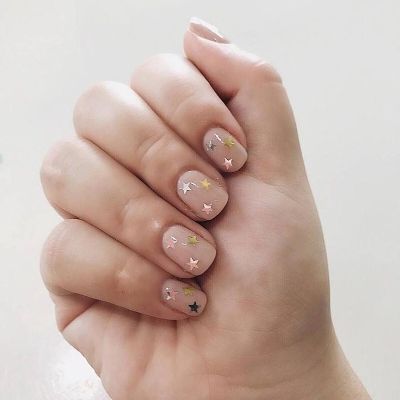
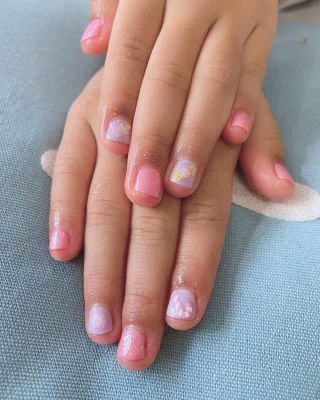
Nude Nails
These nude nails are so chic that they look like they came straight out of a high-fashion magazine! The pink polish on the toes is a nice touch as well. For an extra special touch, add some jewels to the middle finger of each hand (pictured above). This is one nail idea that will always stay in style!
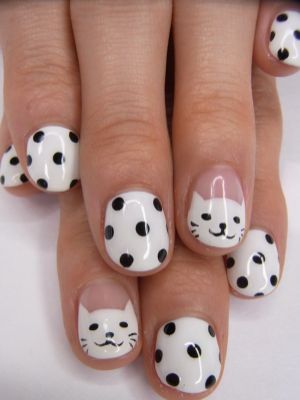
Sloth Nails
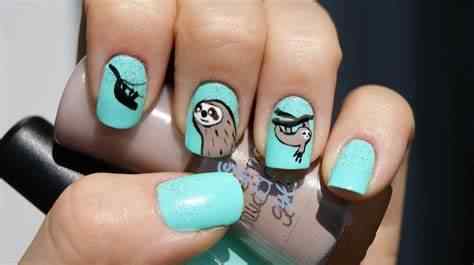
These cute sloth nails are perfect for anyone who loves sloths! They’re easy to create with just two colors of polish and a toothpick! If you want something more straightforward but adorable, try painting them black and white like this girl did!
Toe Nail Styles
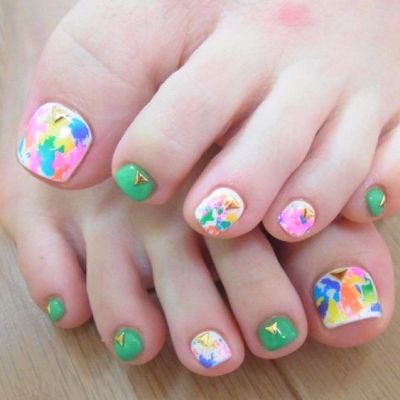
For girls who love girly things and don’t want anything too flashy on their fingernails, consider toe-nail designs instead. So many different colors and patterns are available that choosing just one can be tricky!
Space Nails
This fun design will make you feel like you’re in space! It’s simple, but it looks great! All you need is dark blue nail polish, white nail polish, and black nail polish. Start by painting all your nails dark blue, then use a dotting tool or toothpick to create small dots on each nail (like stars). Next, paint all your nails white except one finger on each hand. On this finger, add two small black dots close together above the first star (this will look like an eye). Then add two small black dots below the second star (this will also look like an eye). Finish off with a clear top coat to protect your designs! This looks great on girls who love all things space-related!
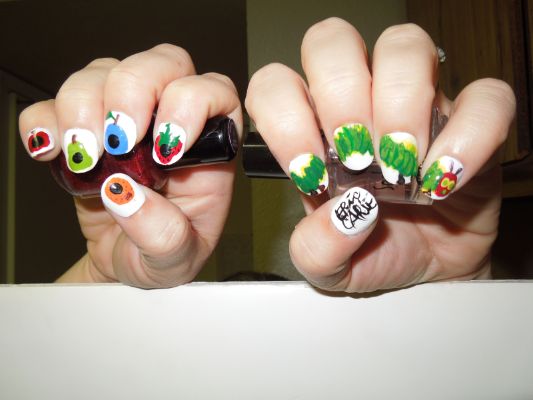
Caterpillars
Create caterpillar shapes using black or brown polish and add dots using a toothpick dipped in white polish for the eyes.
Ice Cream Nails
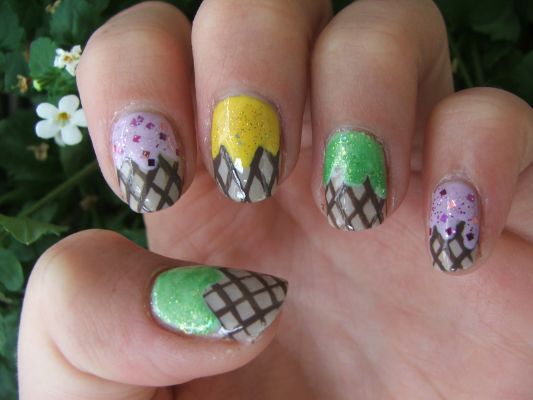
Use a toothpick to draw lines on the nails to make them look like ice cream cones. Then paint the cones in different colors and use sprinkles as toppings.
Cartoon character nails
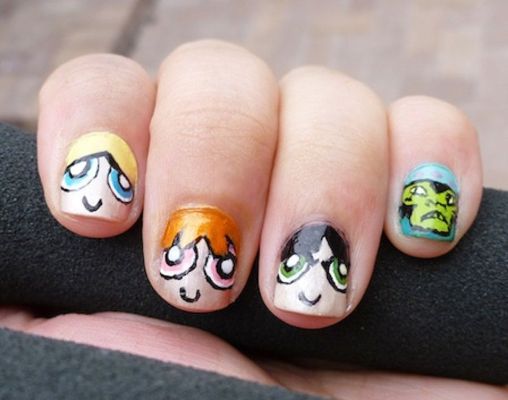
Let your little one pick their favorite cartoon character and create a fun manicure based on that character. You might have them pick a few different characters and make each nail on each hand represent one of those characters. You could even do this on your nails!
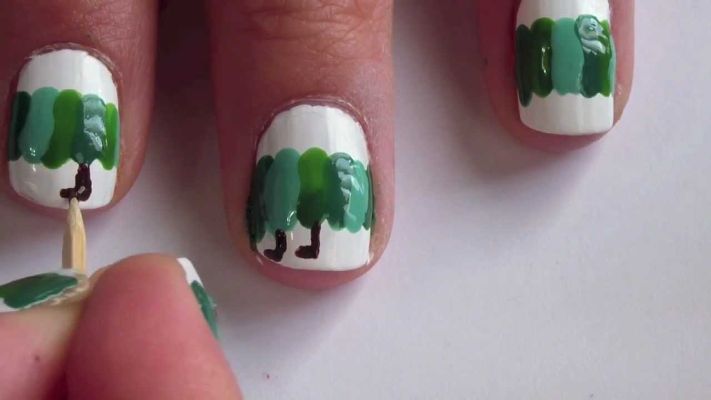
Van Gogh Inspired
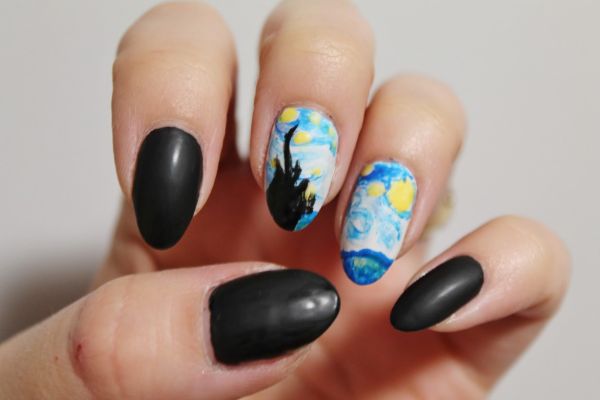
Use yellow and green acrylic paint with a toothpick or q-tip to create a starry night sky on your nails. Then draw an owl with brown acrylic paint and draw some trees in the background with black acrylic paint. This design is perfect for kids who love to watch birds at night!
Butterfly Nails
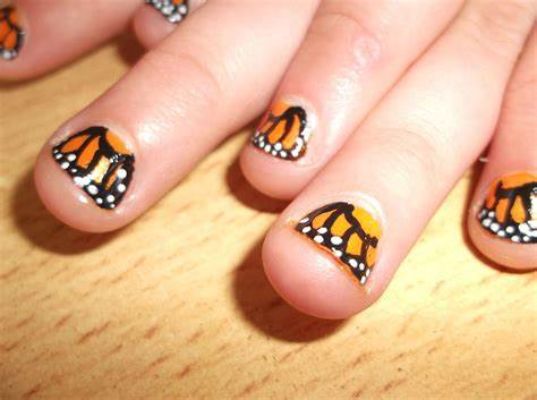
Paint butterflies on each nail using different colors and sizes. This is a fun design that kids can easily do themselves.
Fairy Nails
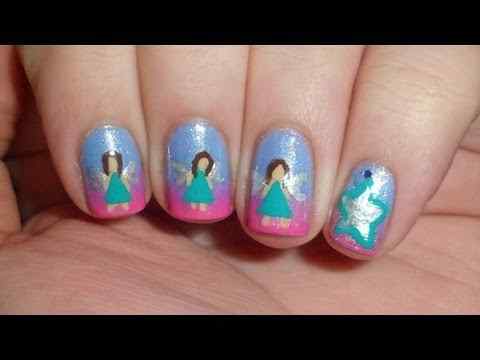
Add little fairies around each nail, or paint fairies on your fingertips for a cute look. Fairies are magical creatures that everyone loves!
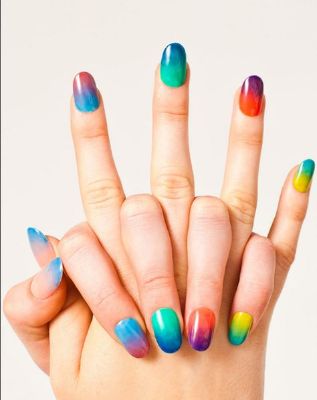
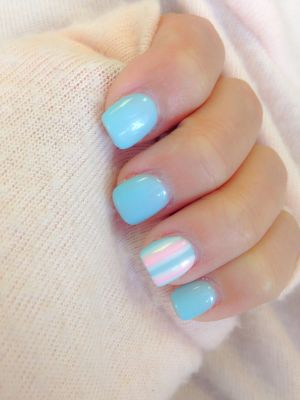
Ombre Classic Nails
The classic ombre nail design is a simple yet elegant look that can be achieved using different shades of the same color. You can choose from light to dark or dark to light and even match the colors with your child’s clothing that day! This design is great for any season because it only requires a little color mixing or blending.
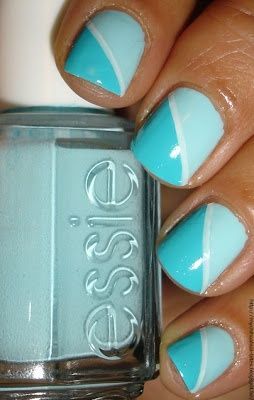
Two Tone
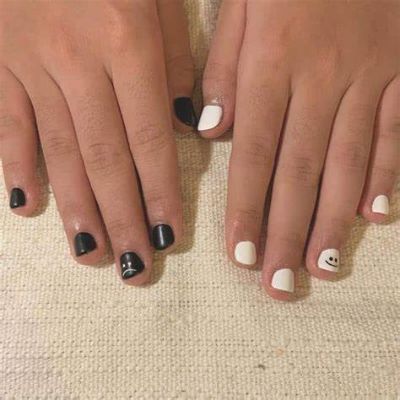
The two-tone nails are a fun and easy nail art idea for kids. This is great because it only requires a little time or effort to create. You only need two nail polish colors, a nail art brush or toothpick, and cotton balls.
To make this design, paint one color on your nail and the other on the remaining half. You can do this by painting the entire nail with one color and then adding the second color in stripes or by painting small circles of each color on top of one another.
Cup Cakes
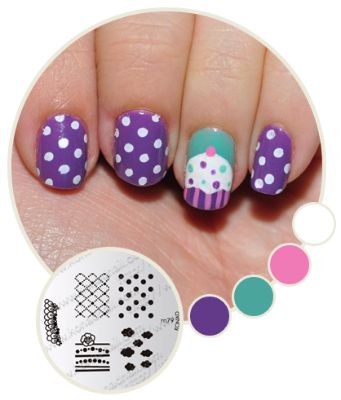
This is another fun design that is easy to make but will look like you spent hours perfecting it! This design will be a hit if you have children who love sweets! It’s also perfect for any occasion and will go with any outfit or event! You only need three nail polish colors (red, yellow, and pink) and your favorite cupcake wrapper image (available online).
Neutral
If your kids still need to get a favorite color or are old enough and mature enough to choose neutrals, go for it! A neutral manicure can be changed up with different colors, patterns or designs.
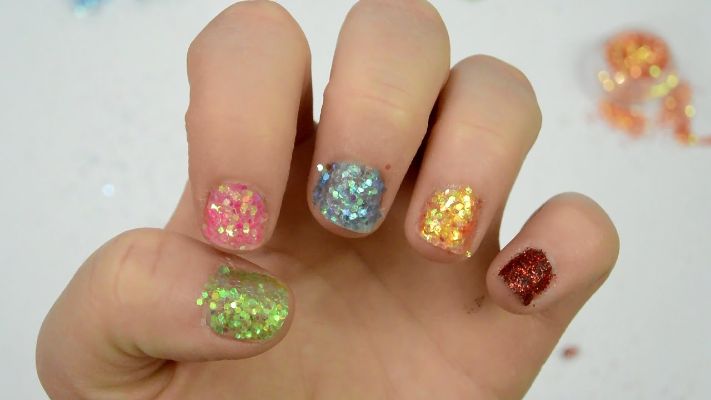
Sparkles
Sparkly nails are always fun. They’re great for parties and dress-up days at school. You can also use sparkle nail polish as a base for other nail art ideas for kids, like stickers or decals.
Ladybug
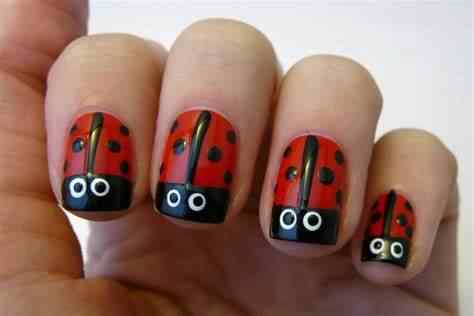
This is one of the most popular designs for little girls. It is so easy to do and only requires two colors of polish and some stickers or dots. All you have to do is paint the fingernails red or pink (depending on their favorite color) and paint one or two spots on each nail using black polish. Then place some tiny white dots on each ladybug using a dotting tool, or toothpick dipped in white polish. You can also use glitter if you like, but it isn’t necessary for this design.
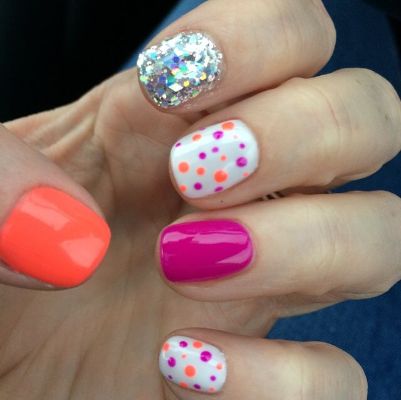
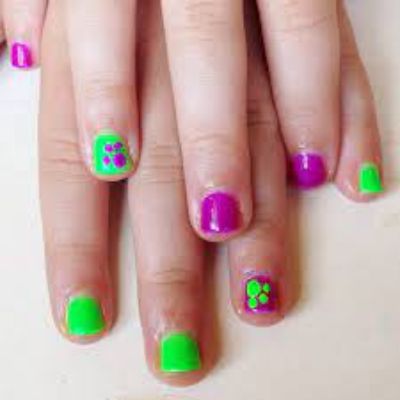
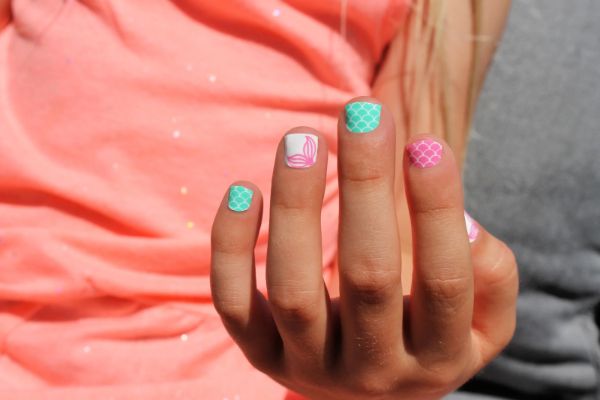
Multi-Colored
Nail art is so popular now that there are even kits for little kids to do their designs! They’re easy enough for anyone to use, but it’s still fun for them to pick out their colors and designs.
There are many kinds of multi-colored nail art: stripes, dots, polka dots – whatever you want! If you want to get fancy, try mixing up multiple shades in one design – like blue and purple together for an ocean look.
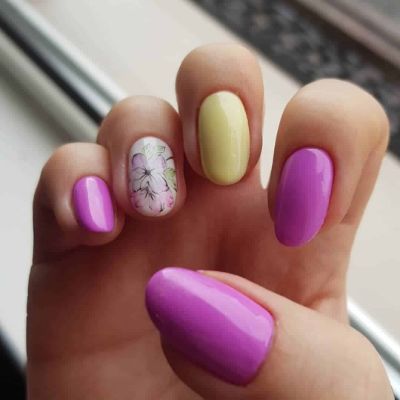
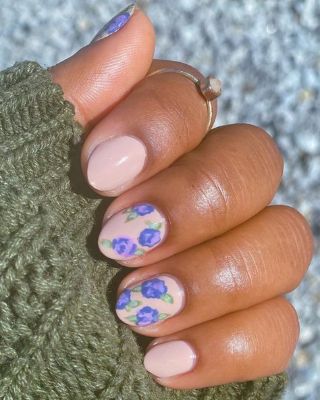
Floral
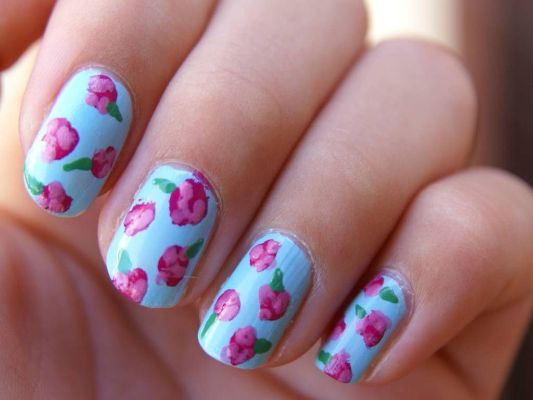
If you have a home flower garden, this would be a perfect nail art idea for your little girl! You can use real or fake flowers, depending on what kind of flowers you have available in your garden or house. This design is excellent because it gives off an innocent and sweet vibe that anyone would love to see on their nails!
Patriotism
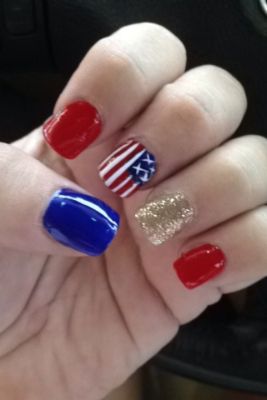
If you want something patriotic, this design is perfect because it will make your nails look great while showing patriotism through them! Remember that not everyone wants to show their patriotism in their nails, so if this doesn’t fit into your personality, don’t force yourself into doing something that doesn’t work with who you are!
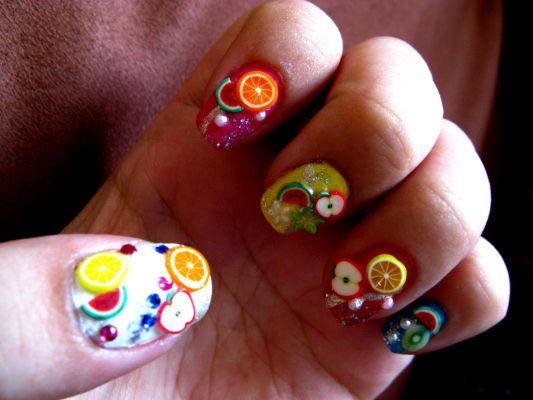
Fruit Nails
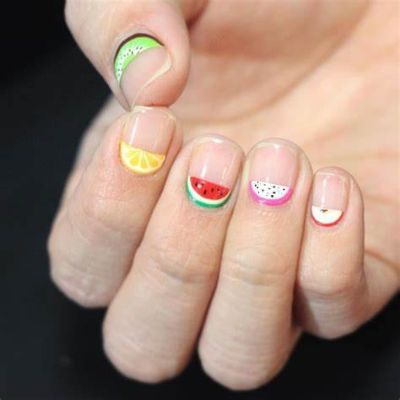
For fun and summery look, paint different fruits on each nail, such as watermelon, strawberries, or pineapples. This design works best with acrylic instead of gel because it will stick better to nonporous surfaces like nails and plastic toys (but it will still work).
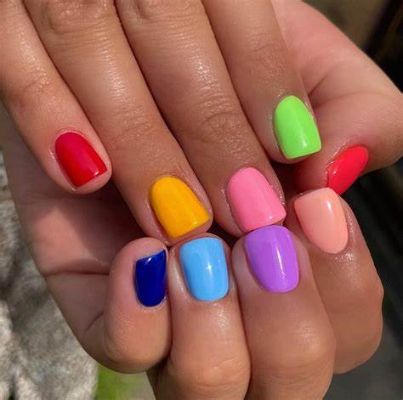
Rainbow
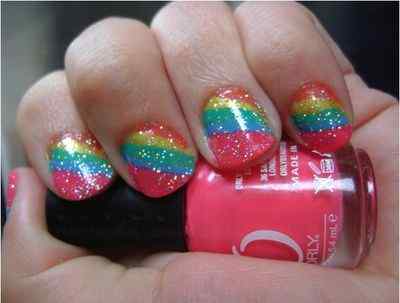
Create a rainbow by painting each nail with a different color of polish from the spectrum — reds, oranges, yellows, greens, and blues work best — then sponging over each nail with white paint. Once dry, use tape to add stripes of glitter polish over each nail, creating a shimmering rainbow effect!
Specks of Rainbows Method
You can use a clear base coat, but it’s unnecessary.
1. Paint your nails with a fun polish. Let it dry completely.
2. Paint a thin layer of yellow polish over the top of the fun polish. This will be your yellow raindrop. Let it dry completely.
3. Using a small dotting tool (or even a toothpick), place a small amount of purple polish in the center of your drop and add three or four small dots around it for the rainbow colors in the raindrop. Let dry completely before moving on to step 4.
4. With your dotting tool, draw small lines from each dot toward the center of your raindrop shape to create “rainbow” trails that flow into one another for added effect (see photo). If you don’t have a dotting tool, you can still create this effect by using a toothpick dipped in nail polish remover or acetone to lift the colors of your rainbow and then reapplying them onto the nail with a toothpick or cotton swab dipped in nail polish remover/acetone until they are all gone, leaving only streaks behind that look like raindrops made them.
Little Princesses
This design looks very cute on little girls as they look more beautiful with these designs on their nails. Little princesses love wearing this design as it looks beautiful on their nails. All you need to do is paint your nails white first, then paint them with colors like pink, blue, green, etc., according to your choice or taste.
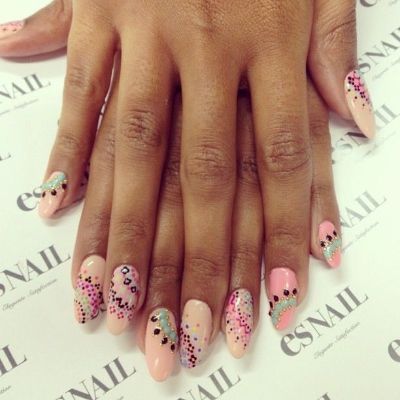
Geometric Nails
These geometric nails are an excellent way for kids to express creativity and individuality. They can choose any colors they want and create whatever designs they like. You’ll need some acrylic paint, nail polish, and a toothpick, making it easy for them to do themselves at home!
Sparkly Stars
This design uses lots of sparkles and glitter, which can be fun for kids who love sparkly accessories. The only thing that’s missing is some shooting stars!
Sparkles and hearts
This is another great option that your daughter will love wearing at any time of the day! This style looks especially cute when it’s warm outside during spring and summer, and everyone wants to show off their pretty nails! It’s also perfect if your daughter loves hearts since they’re everywhere in this style!
Frosted tips
Frosted tips add a bit of class to any manicure, especially for little girls who love princesses and unicorns (or even mermaids!). They’re also easy to apply – all you need is a clear base coat and then paint over it with white polish. If you want to make them more interesting.
Pastels
The color palette of pastel shades is great for kids’ nails. Nails can be painted in soft colors like light pink, light blue, or yellow. The designs can be simple or complex, but they should always be bright and cheerful.
Neon
Neon colors are trendy among children because they look bright and eye-catching. You can paint your nails neon pink, orange, or even neon green if you want something more unusual than the usual neon pink. You can also use neons as accents by adding them only to one nail or two instead of painting them all over your nails simultaneously.
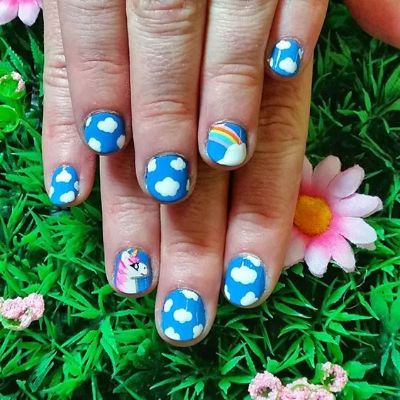
Unicorn
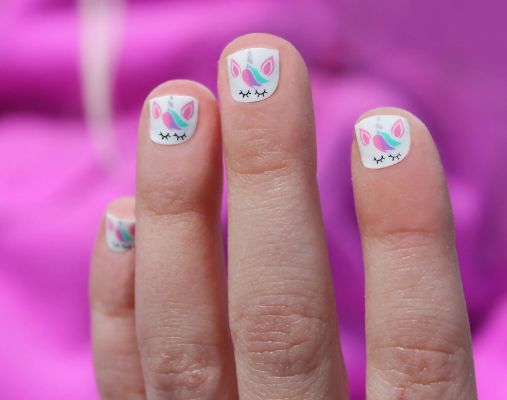
Unicorns are magical. And you can use your nails to show off how magical you are. The best part about unicorn nails is that it’s a cool design for any age. Ensure you have all the colors you need because this will be a long process.
If you’re doing it on your own, start with white polish and create the outline of a unicorn head on each nail. Then go back in with different colors and add details like horns, eyes, and ears. If you’re doing this with an adult, they can help fill in some of the colors while you do others.
Superhero

Make your little one feel powerful with superhero nails. The best thing about these designs is that they’re easy to do at home, even if they turn out differently than planned!
Start by painting each nail black or dark blue and let them dry completely before adding details like capes, masks, and logos in lighter colors like white or silver. You can also color code the characters by making each cape a different color: red for Superman, yellow for The Flash, etc.
Glow-in-the-dark

If your kids love the night, glow-in-the-dark nail polish is perfect! The light will make the nail sparkle in different colors. You can also add some glitter to make it more exciting.
Polka Dots
Polka dots are an excellent choice if you want something simple and cute. You can use regular polish or create your dots using a toothpick dipped in nail polish remover. Dip the toothpick in the remover, then dot it onto your nail with steady pressure until the polish dries. Once you’ve created all of your dots, apply one coat of clear polish over them so they don’t smudge when you add another design.
Spiderweb
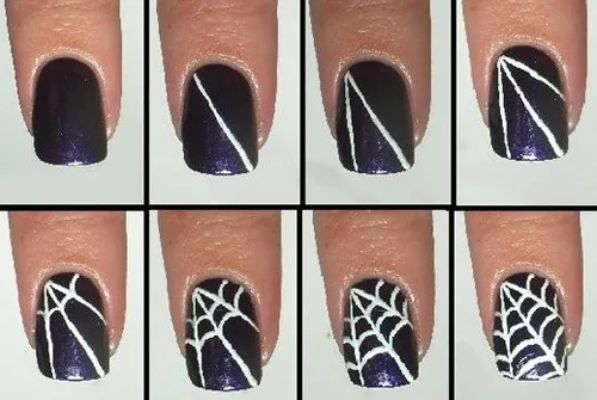
Spiderwebs are an easy way to decorate your nails without thinking too hard about it. All you need is some tape and a bit of patience!
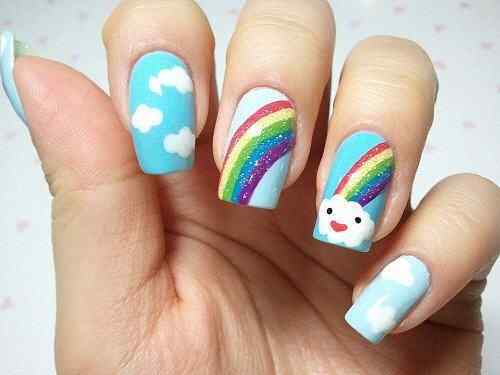
Cloudy skies
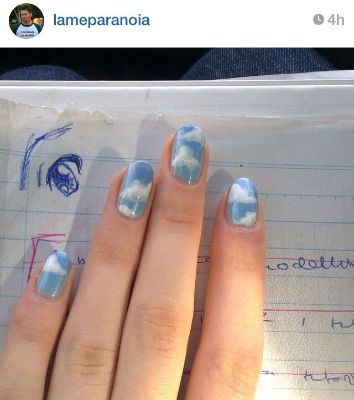
This one’s more involved, but the results are well worth it! Start by painting your nails blue, then use a cotton bud dipped in white paint to create clouds on top of the blue base color. Add some glitter for extra sparkle.
Owl face
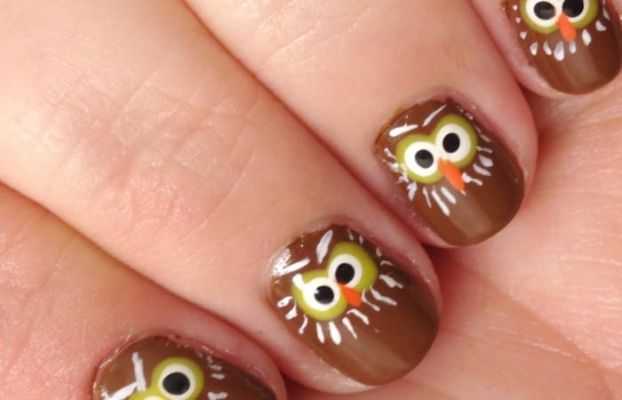
For this nail design, paint two ears and a face onto one of your nails using black or dark brown polish – you can even add little eyes if you want! Then repeat on your other hand and marvel at how cute they look!
Rainbow hearts
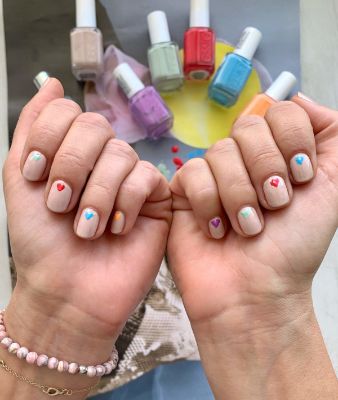
This one is simple but effective – paint each nail different colors until they’re filled with hearts! It’s great if you have kids who love rainbows (or if you do!)
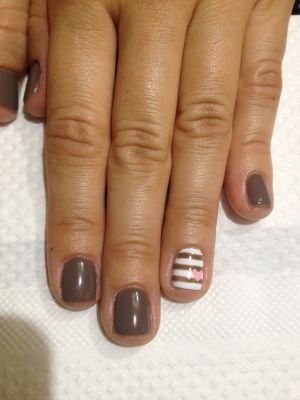
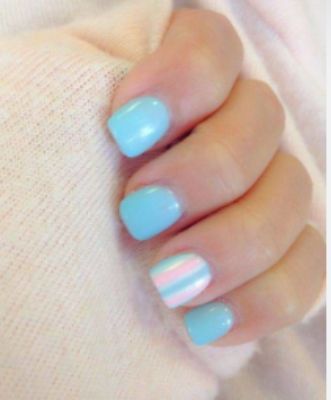
Stripes
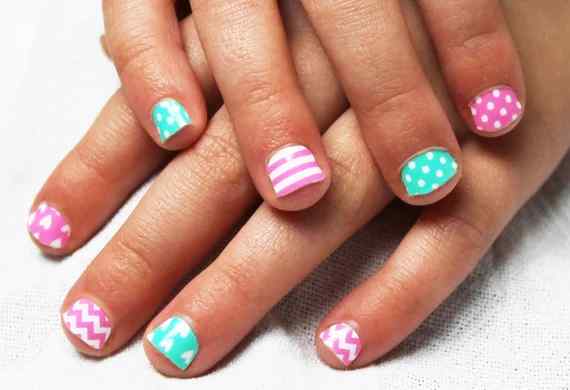
This is another easy design that can be done in just about any color. You’ll need an opaque base coat and two contrasting nail polishes or markers. Paint over the top half of your child’s nails with one color and leave the other bare. Then paint over those same nails again using the second color, but start from the opposite side so that they overlap slightly in the middle of each nail.
Mermaid
Mermaid’s nails are very easy to do. It would help to have a few nail polish colors, a brush, and a top coat. This design will look great on any skin tone and go with any outfit your kid wears. All you have to do is paint half of the nail blue, then paint the other half green or purple, depending on what color you want your mermaid tail to be. Once the two halves are dry, put a layer of clear polish over both sides of the nail and let it dry completely before you add some small scales with different colors of glitter polish.
Here’s how:
1. Paint your nails with a light blue polish. You can use any color that suits your taste, but we recommend pastels or light pinks.
2. Use a nail art brush to draw two lines on each nail — one thick line down the center of each nail and one thin line at the top of each nail. Make sure that both lines are even!
3. Fill in the space inside your lines with dots, which can be done by dotting on some white polish with an application brush or toothpick, then wiping away excess paint with a paper towel or cotton swab until there are no more streaks left behind. You can add smaller dots around the outside edges of your mermaid scales using this technique if you want more detail in your design!
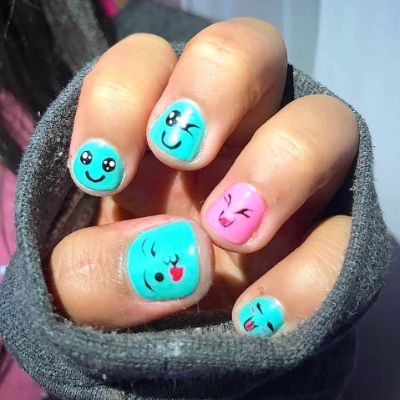
Smiley Faces
Smiley faces also look great on kids’ nails! These are perfect for girls who love unicorns and rainbows! You will need opaque white nail polish, black nail polish, and some white glitter polish to create these nails. Paint all your nails white except for one where you will paint half of it black and leave the other half white or vice versa if you want two different smiles on each hand! Then add some glitter at the bottom of each smiley face for extra sparkle!
Candy Nails
These candy nails are so much fun! They’re perfect for Halloween or any party where you want something sweet and cute! You can also choose different colors for each candy piece to make it truly unique!
Emoji
Emoji nails are so fun and easy. Use your favorite emoji nail art pens or googly eyes to decorate your nails.
Funky Flowers
This is a great way to get kids to practice their fine motor skills while having fun at the same time. You can use a toothpick or a dotting tool and practice drawing petals on each nail. Then, add some leaves and stems with colored polish.
Beautiful Baby Blue
This is one of the most accessible nail art designs I have seen online. You can use any color, but baby blue looks good with this style.
You need only one color for this look, so it’s perfect for kids learning how to paint their nails.
Marble nails

Get different nail polish colors and make circles on each finger with them (don’t mix them!). Then make different-sized polka dots inside each circle by dabbing with a toothpick.
Nail art is all the rage. It’s a great way to express your style and personality, but many people need to learn how to do it.
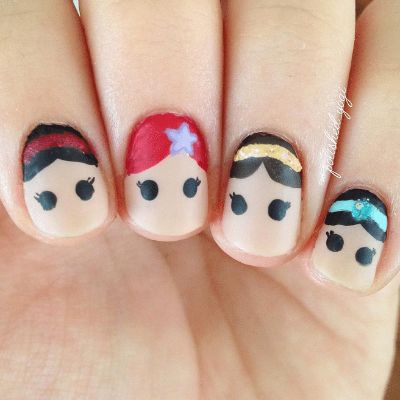
Disney Princess Ideas
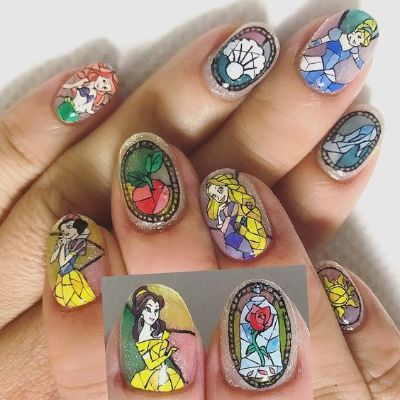
Princesses are always popular with little girls, so why not use them as inspiration for your next manicure? This design uses different shades of pink on each finger to create the image of Cinderella’s dress.
French Manicure
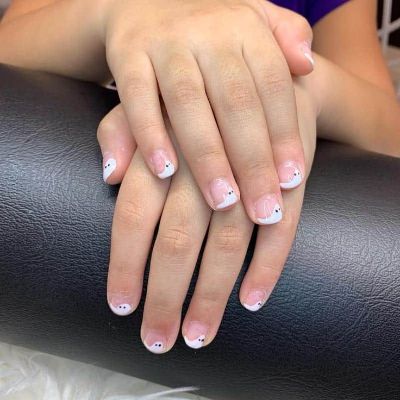
This is one of the easiest and quickest manicures you can do with your kid. You just need polish in their favorite color (make sure it’s not too dark), a small brush, and a top coat to seal it all up at the end!
FAQs
How To Paint Your Nail Tattoos?
Create your nail tattoos with foil wrap and a toothpick or wooden kabob stick by making dots or dashes with the foil before placing them on top of the nails. The foil should be placed on clear polish so the design shows through. You can also create patterns using different polish colors and stickers for more elaborate designs.
What nail shape is most popular in kids?
Round: Round nails are a classic shape for anyone, especially kids. They’re easy to maintain and are great for all occasions.
Square: Square-shaped nails are also trendy among children. They’re simple yet stylish. The corners give them an edgy look that can be dressed up or down depending on the occasion.
Oval: Ovals are perfect for little girls who want to look like princesses but still want to be themselves. These nails are easy to maintain and work with every outfit!
Which nails go on every outfit?
Square: Square-shaped nails go on every outfit because they fit well with any style of clothing or accessory!