Welcome to our delightful DIY guide on creating a heart-shaped gum wrapper! In this simple yet charming project, we’ll show you how to transform an ordinary gum wrapper into a sweet symbol of affection. This creative endeavor allows you to exercise your crafting skills and gives you the satisfaction of turning something as ordinary as a gum wrapper into a lovely piece of art. With just a few steps and some basic materials, you can create a small heart for a cute decoration or a heartfelt gift. So, let’s get started and discover the joy of crafting with a gum wrapper!
Want to give your paper a vintage look? Here’s an easy method to make your paper look old and antique. With just a few simple steps, you can achieve that aged appearance for your documents or crafts.
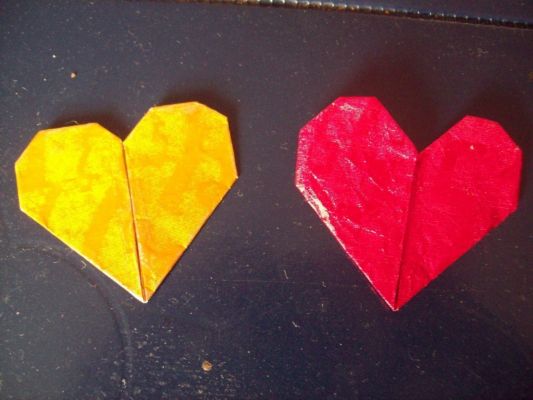
Materials Needed To Make A Heart Out Of A Gum Wrapper
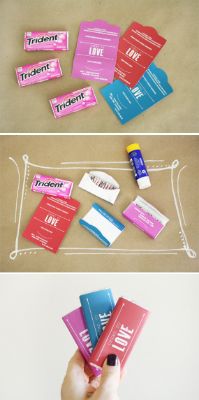
To create a heart-shaped gum wrapper, you will need the following materials:
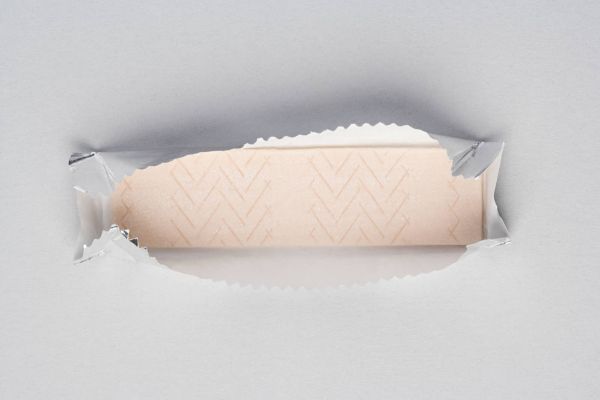
Gum wrapper (preferably clean and unfolded)
- Choose a gum wrapper that is clean and free from any residue.
- Ensure it is unfolded and flat for easy manipulation during folding.
Scissors (small and sharp)
- Use a pair of small and sharp scissors for precise cutting.
- They will help you shape the curves and refine the edges of your heart.
Glue or tape (for added durability)
- While unnecessary, you may use glue or tape to reinforce the folds and secure the heart’s shape.
- This step ensures that your heart remains intact and prevents it from unraveling over time.
Check out this simple guide on how to make a heart out of a gum wrapper. You can also learn how to make beautiful paper tissue flowers here.
Step-by-Step Instructions To Make A Heart Out Of A Gum Wrapper
Creating a heart from a gum wrapper is a fun activity and a great way to exercise creativity. It’s a craft that kids of all ages can enjoy. Whether you’re a child eager to make something special or an adult looking for a quick and enjoyable DIY project, this step-by-step guide will walk you through the process. So, gather your materials and prepare for this delightful crafting adventure. With a simple gum wrapper and a few easy steps, you’ll soon have a charming heart-shaped creation to admire or share with someone special. This fun and engaging activity lets you dive in and bring your artistic talents to life!
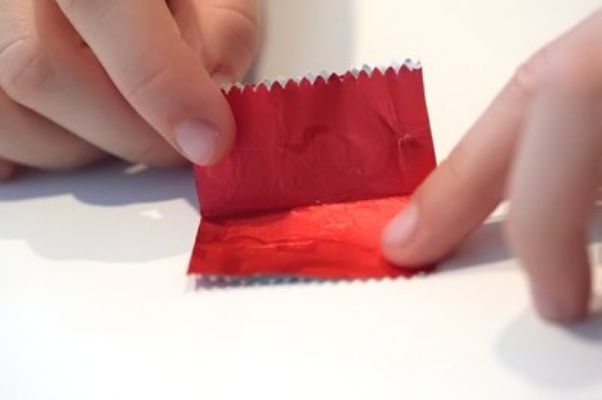
Preparing the Gum Wrapper
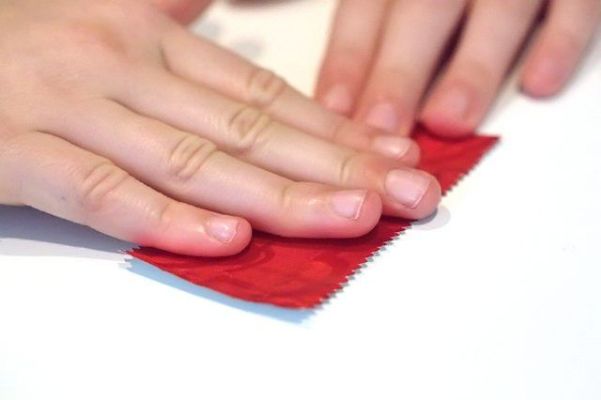
- Find a clean gum wrapper that is unfolded and free from excess gum.
- Hold the wrapper between your hands and gently smooth any creases or wrinkles. This will make it easier to fold and shape later on.
- Take a moment to appreciate the vibrant colors or patterns on the wrapper. This will make your heart-shaped creation even more special.
Ensuring the gum wrapper is clean and wrinkle-free will give you a smooth surface, making the folding process easier and the final heart shape more defined. Taking care of these small details at the beginning will make your crafting experience more enjoyable and your heart-shaped gum wrapper even more delightful.
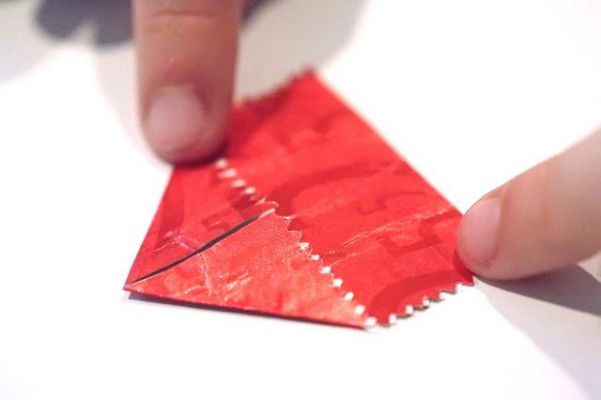
Folding the Base
- Hold the unfolded gum wrapper horizontally before you, ensuring the longer edges are on the sides.
- Fold the wrapper in half lengthwise, bringing the top edge down to meet the bottom edge. Imagine you are folding it like a hot dog bun.
- Press down firmly along the folded edge to create a crisp and defined crease in the middle of the wrapper.
- Open the folded wrapper and see a creased line running down the center.
- Take a moment to admire the symmetry of the folded base, which will be the foundation for your heart shape.
By folding the wrapper in half, you create a sturdy base to shape the heart. The creased line in the middle helps guide the subsequent steps and ensures that your heart turns out even and well-balanced.
Learn how to make a heart out of a gum wrapper and add a touch of creativity to your day. Once you’ve mastered that, why not try your hand at crafting a paper crown? Click here to discover how to make a Paper Crown in just a few simple steps.
Forming the Upper Curve
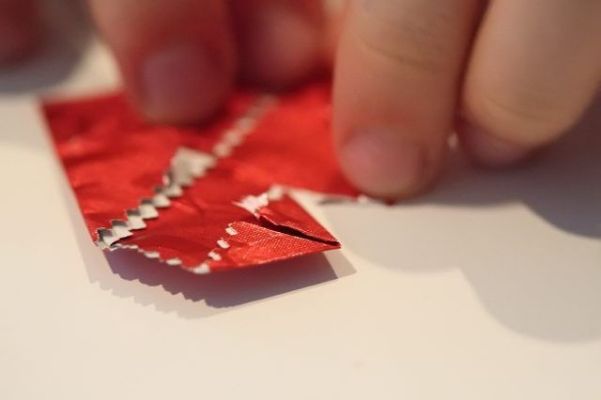
- Hold the gum wrapper with the folded edge facing upwards and the open edges pointing away from you.
- Gently pinch the folded edge between your thumb and forefinger, approximately in the middle.
- Carefully start shaping the upper curve of the heart by pushing the pinched portion outward.
- Gradually work your way from one end of the folded edge to the other, using your fingers to mold the wrapper into a curved shape.
- Aim to create a semi-circle resembling the top part of a heart.
- Press firmly along the folded edge as you shape the curve to create a defined crease.
Take your time while forming the upper curve of the heart, ensuring it is symmetrical and smooth. The key is to apply gentle pressure and make small adjustments as needed.
The top part of the heart should have a rounded shape, resembling the curve of a real heart. Pressing firmly along the folded edge creates a crease that helps maintain the shape and adds definition to your heart. Enjoy the process and embrace the creativity of shaping the gum wrapper into a lovely form!
Creating the Lower Curve
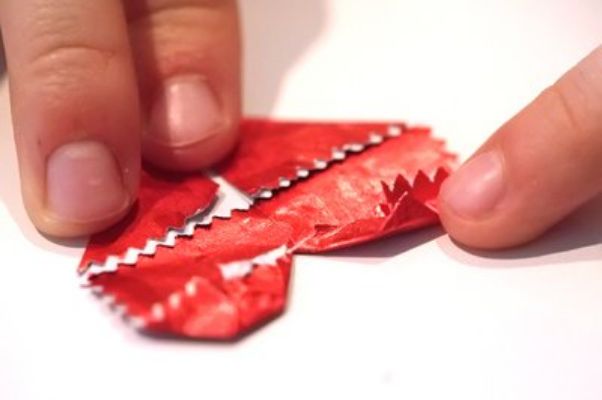
- Continuing from the previous step, hold the gum wrapper with the folded edge facing upwards and the open edges pointing away.
- Just below the upper curve you formed, locate the midpoint of the folded edge.
- Pinch the wrapper gently at this midpoint, similar to how you did for the upper curve.
- Begin shaping the lower curve by pushing the pinched portion outward, gradually working to the ends of the folded edge.
- Aim to create a mirrored semi-circle that complements the upper curve, completing the heart shape.
- Adjust the curve as needed, ensuring it aligns with the upper curve for symmetry and visual appeal.
- Press firmly along the folded edge to create a crease, as you did for the upper curve.
Securing the Heart
- Once you have achieved the desired heart shape, it’s time to secure it to maintain its form.
- If you prefer a more durable heart, you can use a small amount of glue or transparent tape to reinforce the folds and prevent them from undoing.
- Carefully apply a tiny glue dot to the areas where the folds intersect or discreetly place small pieces of tape along the edges.
- Be mindful not to use too much glue or tape, as it may alter the appearance or make the heart bulky.
- Allow the adhesive to dry completely before handling the heart further.
Personal Touches and Variations
By adding your personal touches and exploring variations, you can make each heart creation truly unique. The possibilities are endless, Whether through decorations or experimenting with different materials.
Decorating the Wrapper
- Once you have created the heart-shaped gum wrapper, it’s time to add your personal touch and make it even more special.
- Use markers, pens, or stickers to decorate the wrapper. You can draw patterns, write messages, or add colorful designs.
- Get creative and let your imagination soar. You can add dots, hearts, stars, or other symbols that reflect your personality.
- Consider using different colors to make your heart stand out and showcase your artistic flair.
- Take your time and have fun decorating the wrapper to make it a unique and personalized piece of art.
Expanding Your Creations
- Don’t limit yourself to just one heart-shaped gum wrapper. Explore different sizes of wrappers to create hearts of various dimensions.
- Experiment by combining multiple wrappers to form intricate designs or layered hearts.
- Use colored foil or paper instead of gum wrappers for a different aesthetic.
- Explore additional materials such as ribbons, beads, or sequins to embellish your hearts further.
- Let your creativity run wild, and see how to expand and customize your heart creations.
Learn how to make a heart out of a gum wrapper in just a few simple steps. Once you’ve mastered this fun craft, why not try your hand at making a fortune teller paper? Check out our easy guide to fortune teller paper folding here.
Conclusion
Congratulations! You have successfully transformed a simple gum wrapper into a charming heart-shaped creation. This fun DIY project has allowed you to explore your creativity and craft a unique piece of art. Whether you plan to use it as a decoration, a heartfelt gift, or simply as a reminder of your creative abilities, your heart-shaped gum wrapper will surely bring joy and warmth. Keep exploring new variations, decorating techniques, and materials to expand your craft and continue enjoying the wonderful world of DIY creativity. Happy crafting!
Once you’ve mastered how to make a heart out of a gum wrapper with our simple guide, why not try your hand at crafting a beautiful easy origami rose? Follow our step-by-step instructions to create your own stunning paper flower.