Paper tissue flowers are a popular craft that can be made using just a few materials. They’re also known as tissue paper flowers, or simply TPF for short.
The first thing you must know about these flowers is that they’re not made from tissue paper! The name comes from the fact that they look like real-life versions of the delicate blooms in gift shops and florists’ shops worldwide. And while they may not be exactly like their real-life counterparts, they’re still an amazing way to add color and beauty to any space- at a fraction of what it would cost if you were buying them from an actual store!
The Benefits of Making Paper Tissue Flowers
Making paper tissue flowers is a fun and affordable way to add color and beauty to any space. It’s a creative and relaxing activity that can be enjoyed alone or with friends and family. Plus, paper tissue flowers are eco-friendly and can be reused or recycled, making them a sustainable decor option.
Materials Needed for Making Paper Tissue Flowers
One of the great things about making paper tissue flowers is that the materials are affordable and easy to find. Here’s what you’ll need to get started:
| Material | Quantity |
| Tissue paper | 6-8 sheets per flower |
| Scissors | 1 pair |
| Glue | 1 bottle |
| Floral wire | 1 piece per flower |
| Floral tape | 1 roll |
| Twine or string | 1 piece |
How to Make Tissue Paper Flowers?
Step-by-Step Instructions for Making Tissue Paper Flowers
Step 1: Gather Your Materials
You’ll need tissue paper, scissors, floral wire, and string or ribbon to make tissue paper flowers. You can choose any color of tissue paper you like, but stick to white or pastel shades for a classic look.
Step 2: Cut the Tissue Paper
Lay out the tissue paper and cut it into 6-8 sheets, all the same size. A good size to start with is 8×8 inches. Once you’ve cut the sheets, stack them neatly on top of each other.
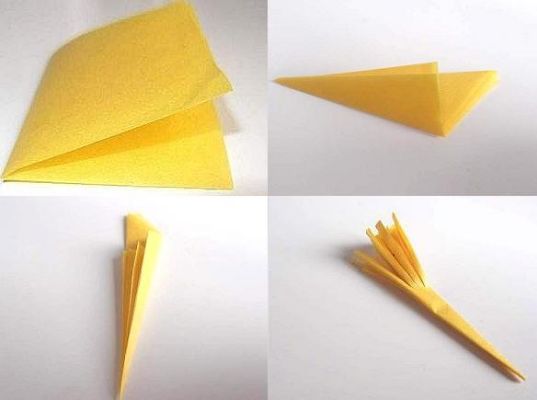
Step 3: Fold the Tissue Paper
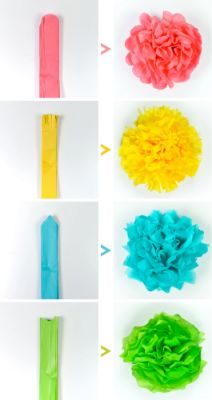
Accordion-fold the tissue paper, making each fold about 1 inch wide. When folding the paper, you should have a long, thin strip.
Step 4: Cut the Ends
Trim the ends of the tissue paper strip into a rounded or pointed shape. This will give your flower a more natural look.
Step 5: Secure the Center
Wrap a piece of floral wire around the center of the tissue paper strip and twist it tightly to secure it in place.
Step 6: Fluff the Petals
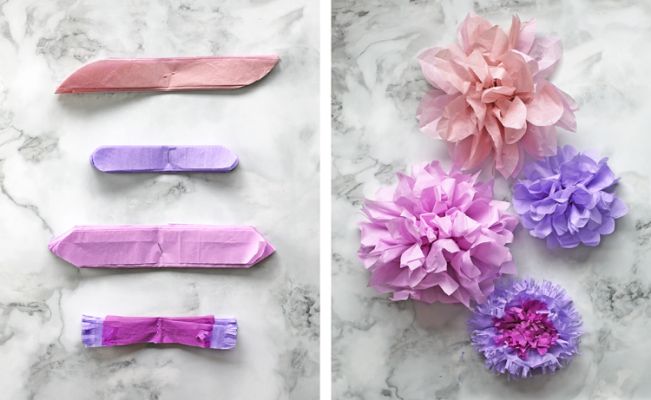
Starting on one side of the wire, carefully separate each layer of tissue paper and pull it upwards, towards the center. Do this on both sides until you’ve fluffed all the layers.
Step 7: Shape the Flower
Once you’ve fluffed all the layers, use your fingers to shape the flower into a round shape. Adjust the petals as needed to create a full, even shape.
Step 8: Attach a Stem
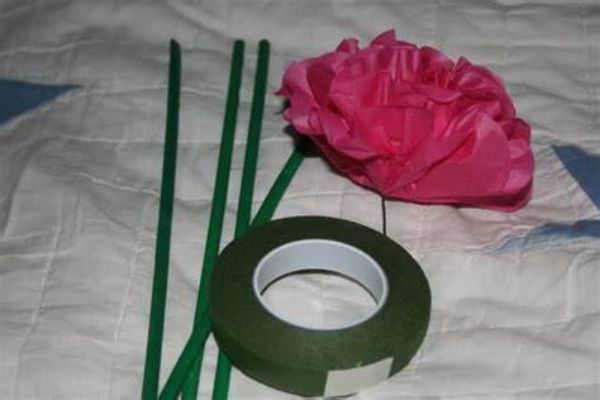
Cut a string or ribbon, and tie it around the floral wire just below the base of the flower. This will serve as the stem for your tissue paper flower.

Tips and Tricks for Creating Perfect Tissue Paper Flowers
- Use high-quality tissue paper to create fuller, more vibrant flowers.
- Experiment with different sizes and shapes of tissue paper to create a variety of flower designs.
- If you want a more natural look, try cutting the ends of the tissue paper into a pointed shape instead of a rounded shape.
- To create a fuller flower, use more layers of tissue paper. You can also layer different colors of tissue paper to create a unique look.
- Use floral wire long enough to create a stem for your flower. You can also use pipe cleaners or wooden skewers for the stem.
- Be gentle when fluffing the flower’s petals to avoid tearing the tissue paper.
- You can also add embellishments to your tissue paper flowers, such as glitter or ribbon, to create a more personalized look.
By following these step-by-step instructions and incorporating these tips and tricks, you can create beautiful tissue paper flowers that are perfect for any occasion!
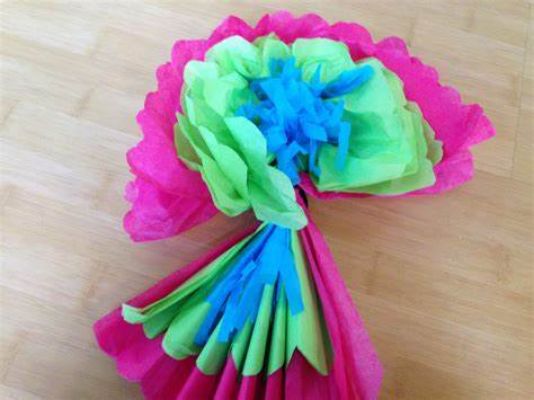
How to Make Mexican Tissue Paper Flowers?
Step-by-Step Instructions for Making Mexican Paper Flowers
Mexican tissue paper flowers, or papel picado, are popular for festivals and celebrations. Here’s a step-by-step guide to making your own:
Materials needed:
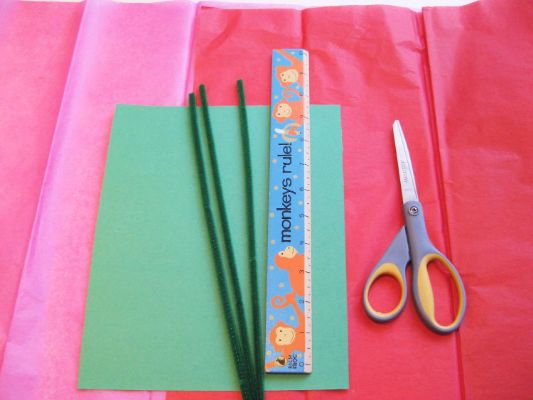
- Tissue paper (in desired colors)
- Floral wire or pipe cleaners
- Scissors
- Pencil
- Ruler
Instructions:
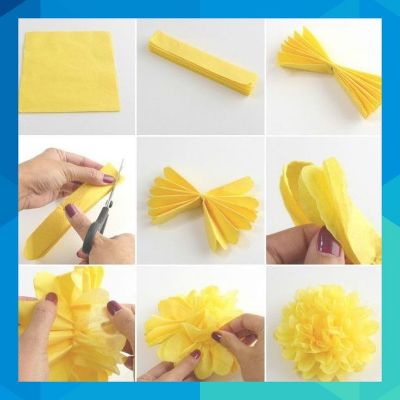
- Cut the tissue paper into rectangular pieces. The size will determine the size of your flower. A good starting size is 8×10 inches.
- Stack 6-8 pieces of tissue paper on each other, ensuring the edges are aligned.
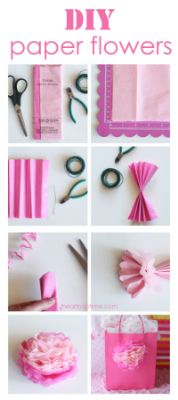
- Fold the tissue paper back and forth in an accordion-style fold, making each fold about 1 inch wide.
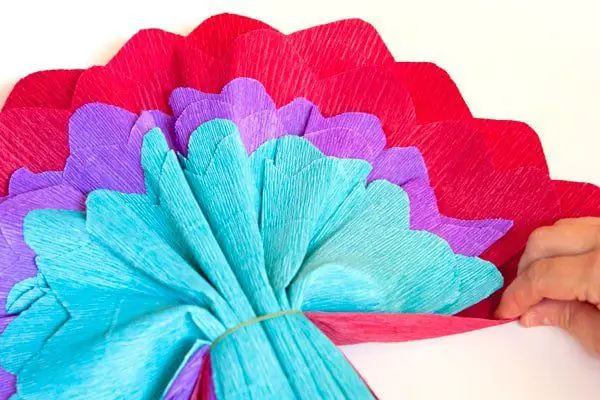
- Once you have folded the entire stack of tissue paper, fold it in half and twist the center tightly.
- Take a piece of floral wire or pipe cleaner and wrap it around the twisted center, twisting it tightly to secure it in place.

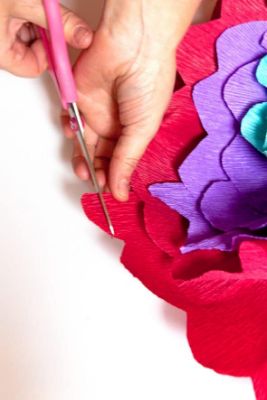
- Using scissors, cut both ends of the tissue paper into a point or a rounded shape. This will create a petal shape for your flower.
- Carefully separate the layers of tissue paper, starting with the top layer and pulling them towards the center of the flower. Separate each layer until you have a full and fluffy tissue paper flower.
- To make the fringe, cut the edges of the petals into strips, being careful not to cut to the center. Cut as many or as few strips as you want to create the desired look.
- Use the pencil to curl the fringed petals, rolling them between your fingers until they curl up.
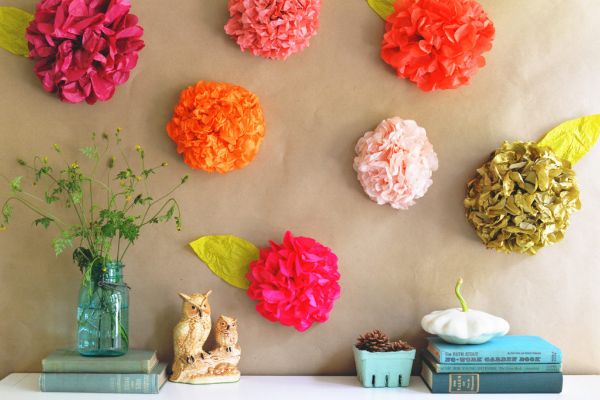
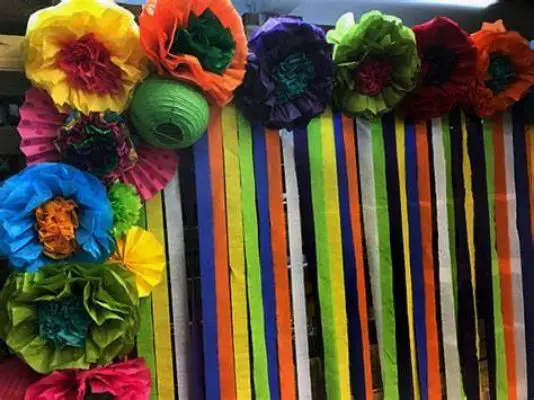
Repeat these steps to create as many flowers as you need. Once you have a collection of flowers, you can use them to create a garland, decorate a party space, or use them as a colorful centerpiece.
Enjoy your beautiful Mexican tissue paper flowers!
Tips and Tricks for Creating Fuller and More Colorful Mexican Paper Flowers
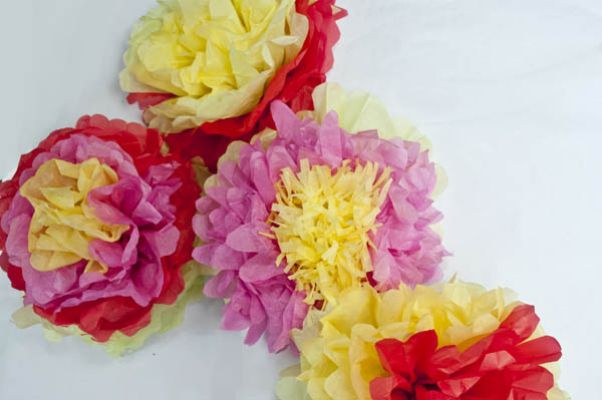
- Use bright red, yellow, and pink tissue paper to create an authentic Mexican look.
- Cut the fringe carefully to create a uniform, textured look.
- Use more layers of tissue paper to create a fuller flower.
- Experiment with different sizes and shapes of tissue paper to create various flower designs.
- Be gentle when fluffing the flower’s petals to avoid tearing the tissue paper.
- Add embellishments to your Mexican paper flowers, such as glitter or sequins, to create a more personalized look.
By following these step-by-step instructions and incorporating these tips and tricks, you can create beautiful Mexican paper flowers that are perfect for any fiesta or celebration!
How to Fold a Paper Flower? – A Step-by-Step Guide

Here’s a step-by-step guide on how to fold a paper flower:
Materials Needed:
- A square piece of paper (any size, depending on the desired size of the flower)
- Scissors
- Pencil or pen
Instructions:
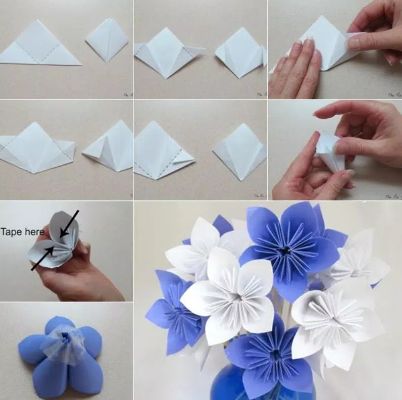
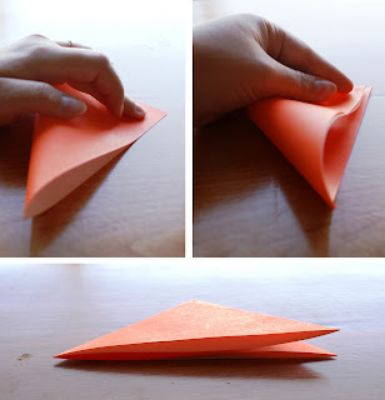
Step 1: Fold the Paper in Half. Fold the square piece of paper in half diagonally to create a triangle. Crease the fold well and then unfold the paper.
Step 2: Fold the Paper in Half. Again, Fold the paper in half diagonally in the opposite direction to create another triangle. Crease the fold well and then unfold the paper.
Step 3: Fold the Paper in Thirds. Take one of the corners of the paper and fold it up to the center point where the two diagonal folds intersect. Repeat with the opposite corner, ensuring the two corners meet at the center point. Crease the folds well.
Step 4: Fold the Paper in Half Fold the paper in half along the center crease to bring the two folded corners together. Crease the fold well.
Step 5: Cut the Petals Using scissors, cut the top edge of the folded paper into a rounded or pointy petal shape. Be careful not to cut through to the bottom edge of the paper.
Step 6: Unfold the Paper. Gently unfold the paper to reveal the flower shape. Adjust the petals as needed to create the desired shape.
Step 7: Add a Stem. If desired, add a stem to your paper flower by attaching a piece of floral wire or a straw to the bottom of the flower using tape or glue.
With these simple steps, you can easily fold a paper flower. Experiment with different sizes of paper and petal shapes to create various flower designs. This is a fun and easy craft project for kids and adults!
How to Make Artificial Flowers from Tissue Paper? – Step-by-Step Guide
Step-by-Step Instructions for Making Artificial Tissue Paper Flowers:
Materials needed:
- Tissue paper (in desired colors)
- Floral wire or pipe cleaners
- Scissors
- Ruler
- Pencil
Instructions:
Cut tissue paper into rectangular pieces.
The size will determine the size of your flower. A good starting size is 8×10 inches.
- Stack 5-8 pieces of tissue paper on each other, ensuring the edges are aligned.
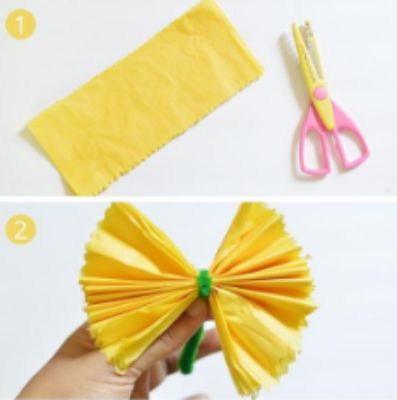
- Fold the tissue paper back and forth in an accordion-style fold, making each fold about 1 inch wide.
- Once you have folded the entire stack of tissue paper, fold it in half and twist the center tightly.
- Take a piece of floral wire or pipe cleaner and wrap it around the twisted center, twisting it tightly to secure it in place.
- Using scissors, cut the ends of the tissue paper into the desired shape. A rounded shape will create a more traditional flower shape.
- Gently separate the layers of tissue paper, starting with the top layer and pulling them towards the center of the flower.
- Separate and fluff each layer until you have a fluffy tissue paper flower.
Tips and Tricks for Creating Sturdier and Longer-Lasting Tissue Paper Flowers:
- Use double the amount of tissue paper for a sturdier flower.
- Use floral wire instead of pipe cleaners for a more secure stem.
- A hot glue gun attaches the floral wire to the twisted center for extra stability.
- Spray the finished flower with a light mist of water and allow it to dry before using it in decoration.
- Use a sealant spray, such as hairspray, to help preserve the flowers. Hold the can about 10 inches away from the flower and give it a light coating, being careful not to saturate the tissue paper. Allow the spray to dry completely before handling the flower.
- Store the finished flowers in a dry, cool place to prevent them from getting damp and losing shape. A cardboard box lined with tissue paper is a good storage option.
Conclusion
Making tissue paper flowers is a simple, cost-effective, and enjoyable activity that can add color and beauty to any event or space. With just a few materials and basic steps, anyone can create stunning flowers perfect for decorating or gifting.